PART 7: WORKING WITH STACKS
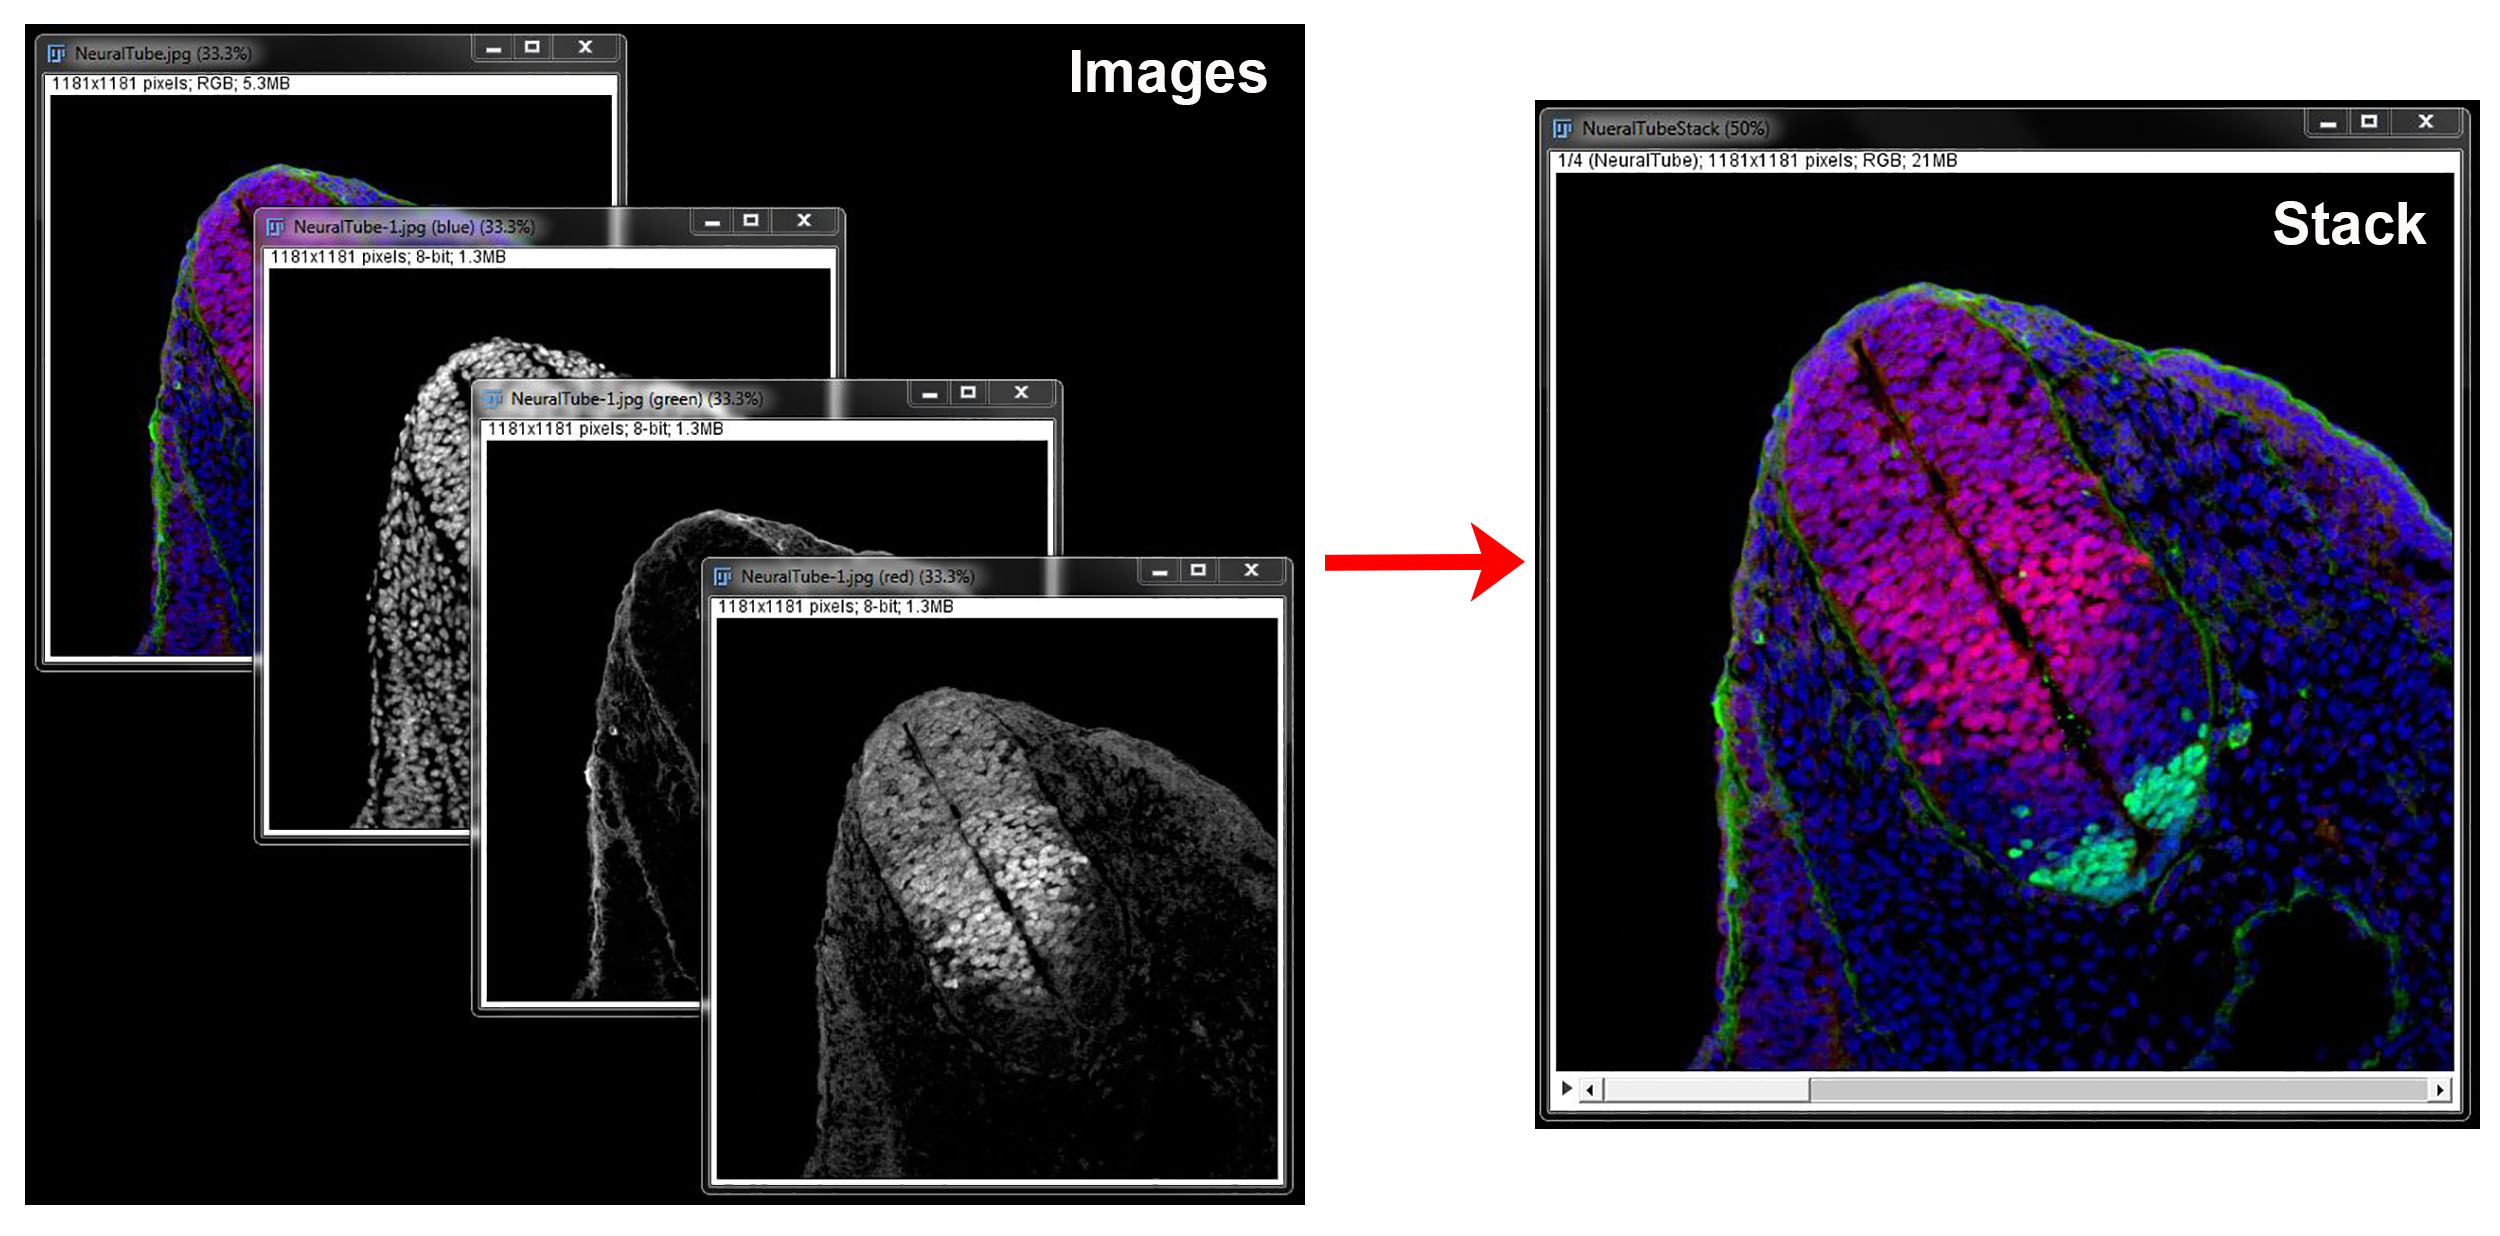
Image stacks are composed of a number of related images opened on top of each other in a single window. Stacks can represent different channels from the same image, z-slices captured on the microscope or time series. When channel, Z-series or time information is recorded the images are usually opened as stacks automatically when bio-formats importer is used to open the files. You can also generate a stack yourself from related TIFF or JPEG images.
This section goes through the tools and methods for working with image stacks. More detailed informaiton on working with multiple dimmensions in imaging and stacks is covered in FIJI Intermediate.
The image NeuralTube.jpeg along with its individual channels and image stacks RGBStack.tif and MovieStack.tif will be used for demonstration throughout this section.
Navigating Stacks
You can easily move through the slices in a stack using the bar at the bottom of the image.

Click and drag the slider (1) to move through the stacks. You can also click on the left (2) and right (3) arrows to move the stack by 1 slice or click the play button (4) to run through the stack slices automatically.
You can monitor the slice number in the image information at the top left of the image window.

Creating and Dismantling Stacks
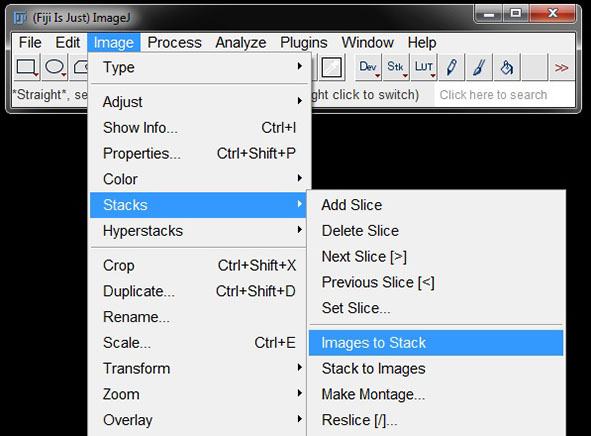
To create a stack from multiple individual images go to Image -> Stacks -> Images to Stack.
An options window will open. You can give the stack a new name, or keep the generic ‘Stack’. To keep the original images select the box next to Keep Source Images.
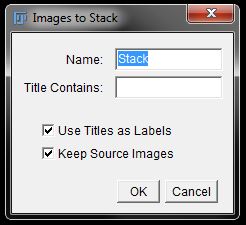
Click OK to generate the stack.
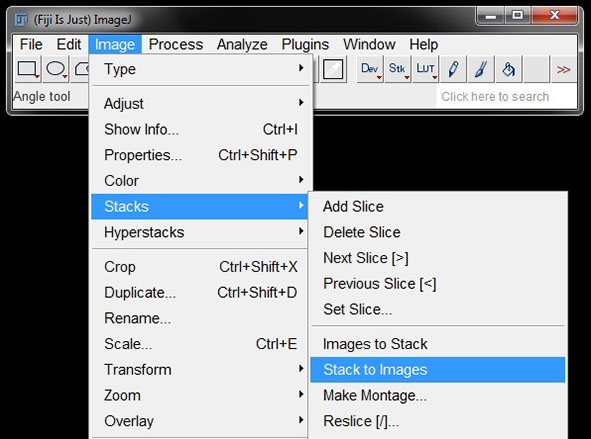
To reverse this and generate multiple single images from a stack go to Image -> Stacks -> Stack to Images.
Duplicate Stack
You can use the Duplicate function for stacks also. Select your stack and follow the menu or shortcut to Duplicate as previously shown.

When using Duplicate for a stack, only the current slice will be duplicated as a single image. This can be useful if you want to extract a slingle slice from your stack for display or analysis purposes.
However, in the Duplicate window you will now have more options, where you select Duplicate Stack and can also nominate spceific slices to be duplicated intot he new stack. Use these options to duplicate multiple slices or the entire stack.

When you are happy with your options, click OK to duplicate.
Altering Stack Slices
You can alter the slices in a stack by adding, deleting or rearranging them.
To add or delete slices from a stack, navigate to the slice you want to modify and go to Image -> Stacks, and select the desired option.

Selecting add slice will insert a new blank/black slice into the current stack position. Selecting delete slice will remove the current slice from the stack.
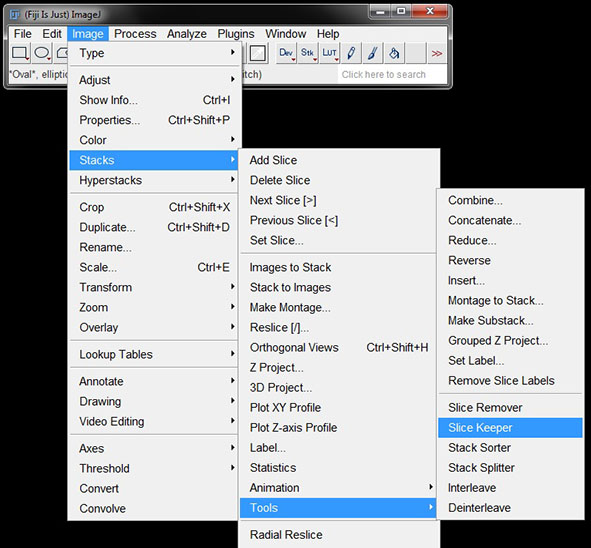
You can also add and delete multiple slices using the Slice Keeper or Slice Remover tools.
Slice Keeper is found under Image -> Stacks -> Tools.
Slice Keeper will ask you to nominate the slices you wish to keep in the stack, by number. You can also use Increment to keep every 2nd, 3rd, 4th, etc slice from the stack. Enter your numbers and select OK to generate the new stack.

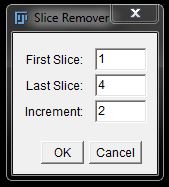
Slice Remover is found on he same menu as Slice Keeper.

The Slice Remover will prompt you to nominate the slices you wish to remove from the stack, by number. As with slice keeper, you can also use Increment to remove every 2nd, 3rd, 4th, etc slice from the stack. Enter your numbers and select OK to generate the new stack.
Slice Keeper and Slice Remover are fairly interchagable and ultimately serve the same function.
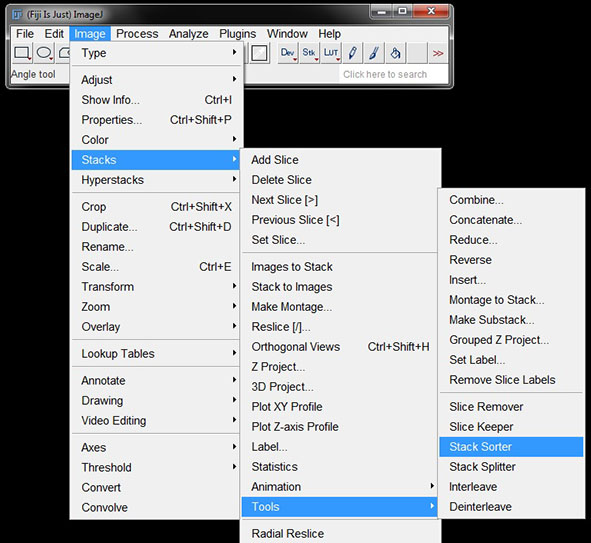
You can also rearrange the order of slices in a stack using the Stack Sorter tool. Go to Image -> Stacks -> Tools -> Stack Sorter.
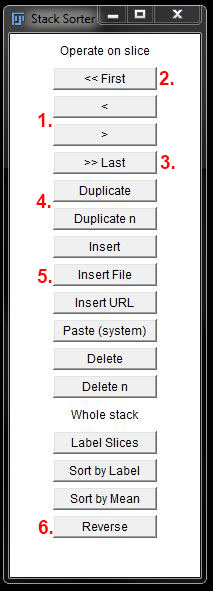
You can then move a slice forwards or backwards using the arrows (1) in the options box.
You can also select First (2) or Last (3) to move the current slice to the front or back of the stack.
Other options include duplicating a slice (4) or inserting a new image into the stack from a file (5).
All of these commands will act on the current slice in the stack. Always scroll to the slice you want to change before selecting an option.
You can also select Reverse (6) to reverse the order of the entire stack.
Split and Concatenate Stacks
You can split a stack into smaller parts by selecting Image -> Stacks -> Tools -> Stack Splitter.
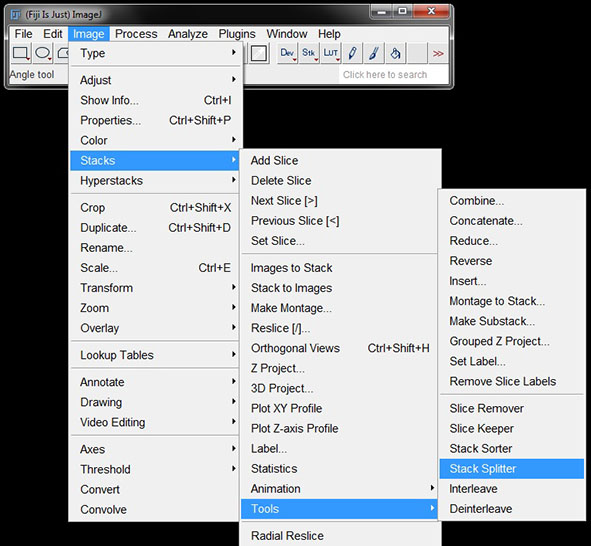
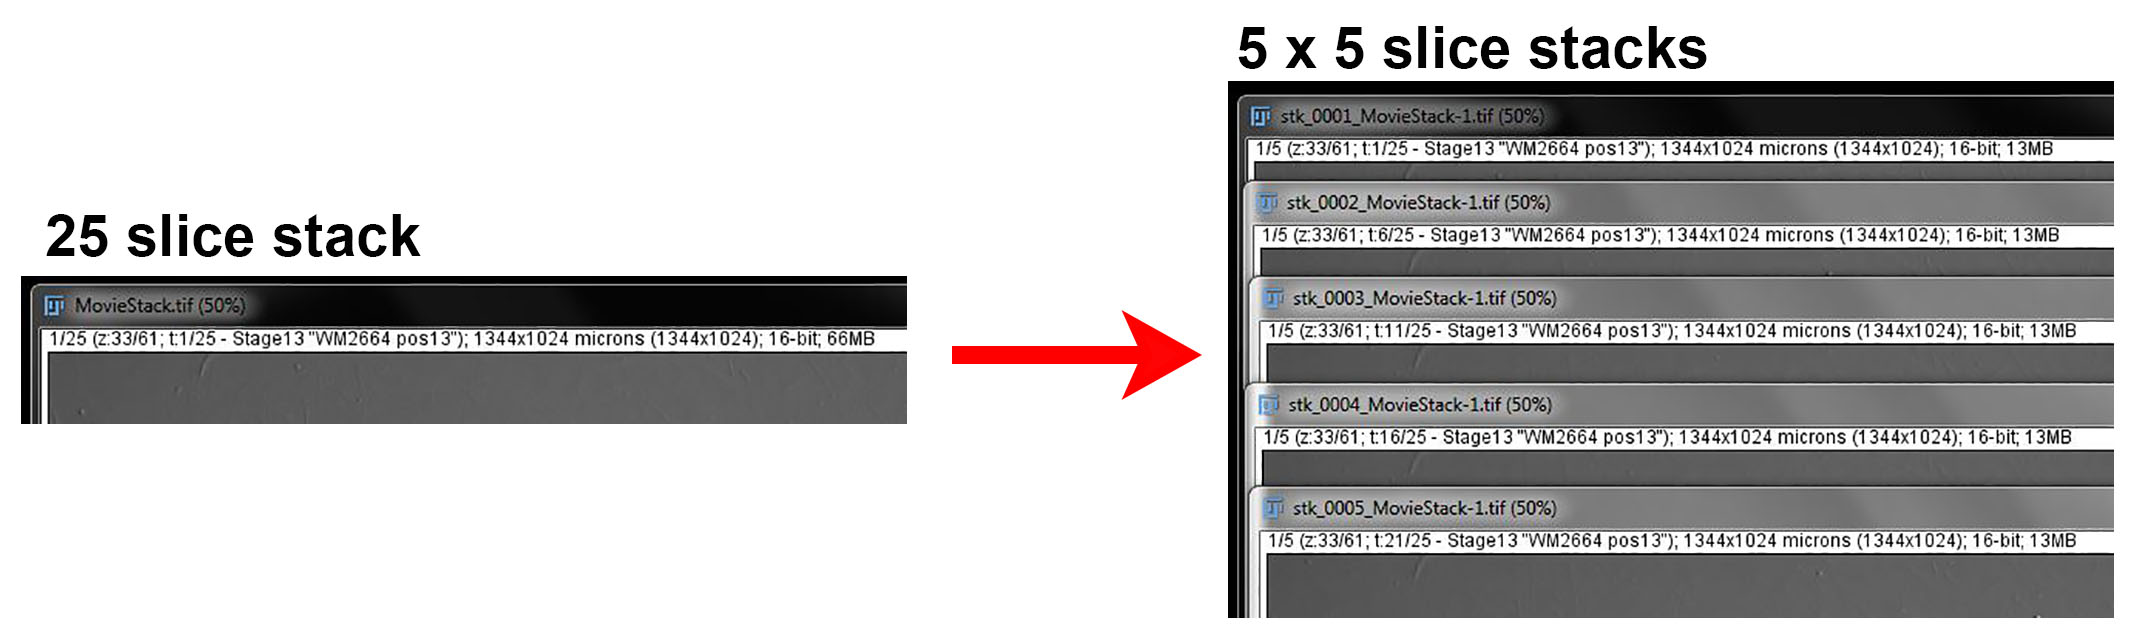
Enter the number of smaller stacks you wish to split into and select OK.
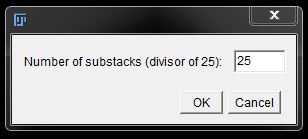
Note: The smaller stacks must be of equal size, so you need to enter a number divisible by the total number of slices. This allows the stack to split into multiple equal parts.
To combine multiple small stacks into one select Image -> Stacks -> Tools -> Concatenate.

In the resulting Concatenator window, you can check the box to include All open windows, or add and sort the desired stacks in the correct order using the drop down menus. You can give the new stack a name or keep the generic ‘Concatenated Stacks’ and check the box next to Keep original images if you wish to keep the smaller stacks open.

Then select OK to generate the combined stack.
Make Montage
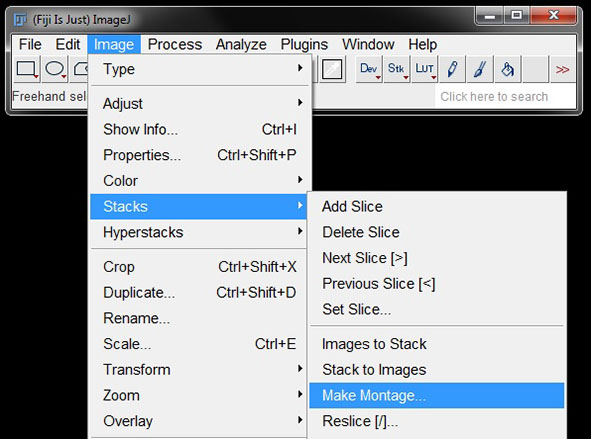
You can use image stacks to generate side by side montages of channels, time points or z-sections. Select your stack then go to Image -> Stacks -> Make Montage.
A window will open with a number of options for generating the montage, including the number of columns and rows that you want in the montage, scaling of the images, which slices of your stack you want to include, if you want to use increments and border width. You can also select the check box to label the montage with the slice titles.
Input your required options and select OK to create the montage.
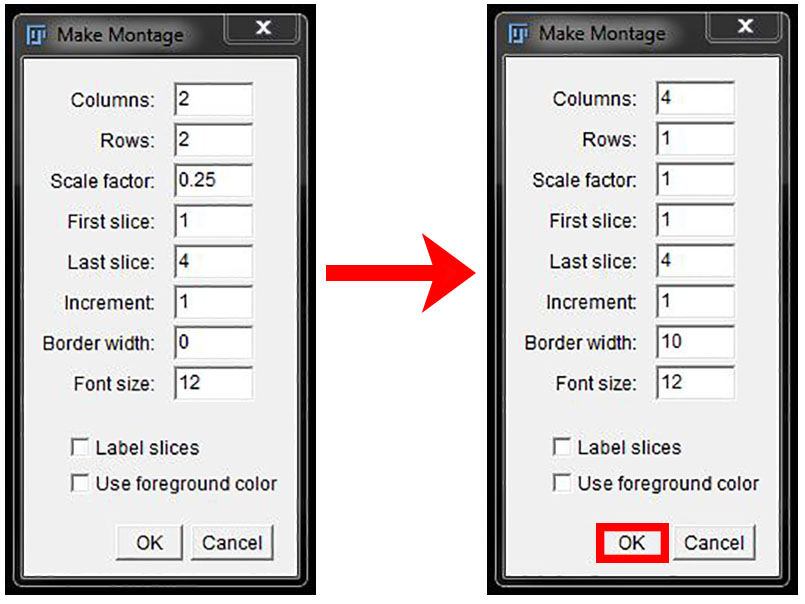
In the example below we have generated a montage of the individual channels plus the merged image using the settings shown in the options window above, but the same principles can be applied to create a montage of times or z-slices as well.

Maximum Intensity Projections
To create a maximum intensity projection of a confocal z-stack, open your stack and go to Image -> Stacks -> Z-Project.
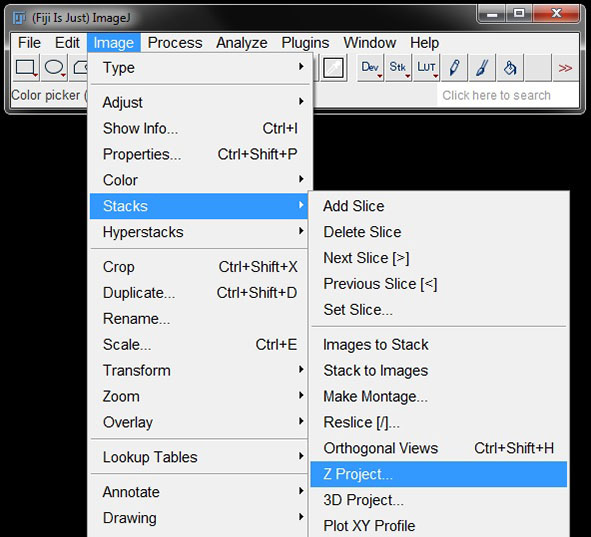
In the Z Projection window enter the first and last slice you want to project and the type of projection. For a maximun intesnity projection, select Maximum Intensity from the drop down window. Click on OK to create the projection.

A new window will open with the projected, single plane image.
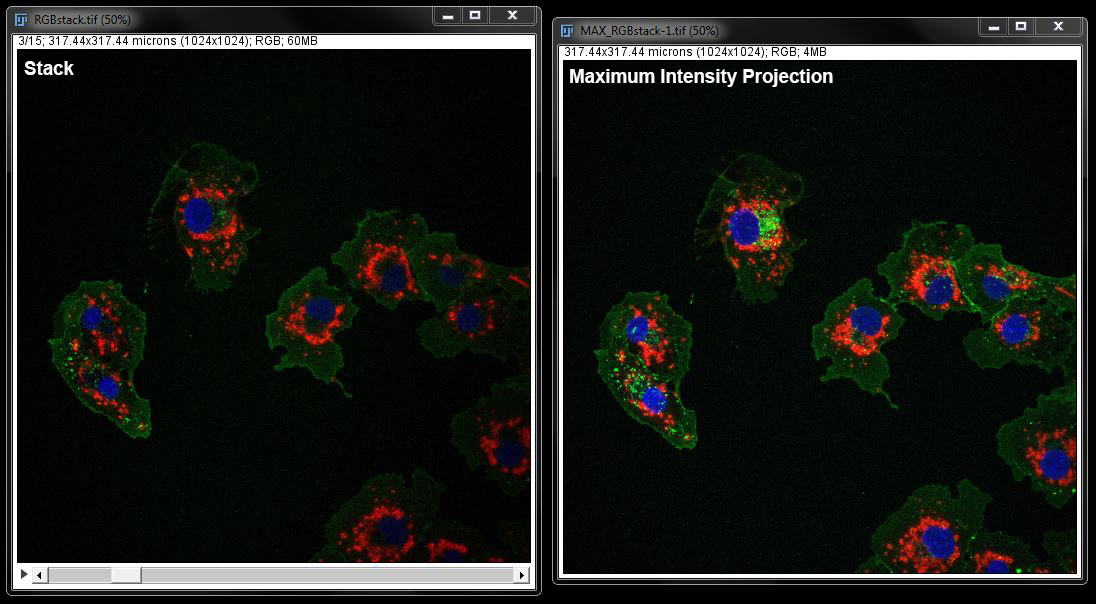
The new image will have the default name ‘MAX_imagename’. You can rename this when saving by using the Save As function.