PART 4: SCALES AND SIZING
For proper presentation of images it is essential to include a scale bar. This allows the viewer to see the scale of the image being presented and make their own conclusions about the data. Calibrating an image is also important if you want to get meaningful size-related measurements out of the image in any later analysis. Calibration is also important when resizing your images. In this section we will show you how to find calibration information from the image, and how to set the scale if the image is not calibrated. We will also demonstrate how to add a scale bar and how to crop and resize images without altering the image data.
This section uses the images Interstitium 2.tif and TrichromeIHC.tif for demonstration.
Finding Scale Information in the Image Properties
In some circumstances FIJI will be able to calibrate your image automatically by reading the attached metadata. This is usually the case for images originally saved in the raw file format.
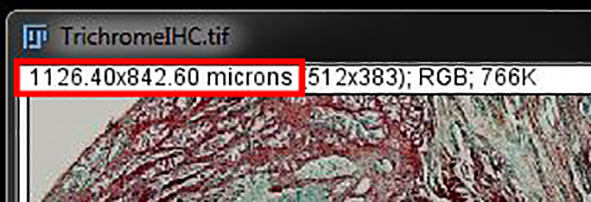
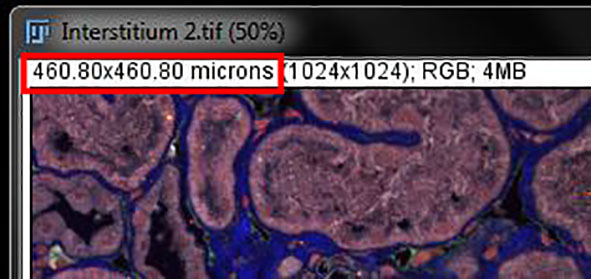
If the scale is already calibrated the dimensions shown on the image will be in microns instead of pixels.
In a calibrated image you can find the scale in microns/pixel by going to Image -> Properties (or use shortcut Ctrl+Shift+P).

This will open a display window showing the dimensions of the image and the scale will be automatically populated at the correct size.
For this image we see the scale is automatically set at 2.2microns/pixel.
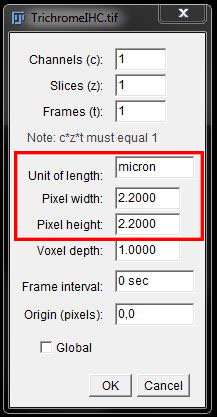
You do no need to make any changes here, select OK or close the window to exit.
You can also find the calibrated scale, this time in pixels/micron, by going to Analyze -> Set Scale.

Here you will also find the dimensions correctly populated from the metadata if your image was already calibrated.
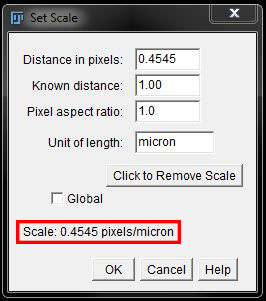
Under Set Scale the calibration (pixels/micron) is the inverse of that shown under image properties (microns/pixel).
You do no need to make any changes here, select OK or close the window to exit.
Finding Scale Information in Metadata
When opening a file using bio-formats importer you can also find the calibration in the metadata, although this can sometimes be hard to find within the long list of parameters.
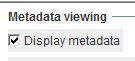
To find the calibration in the metadata, ensure Display Metadata is selected in the bio-formats options as previously described.
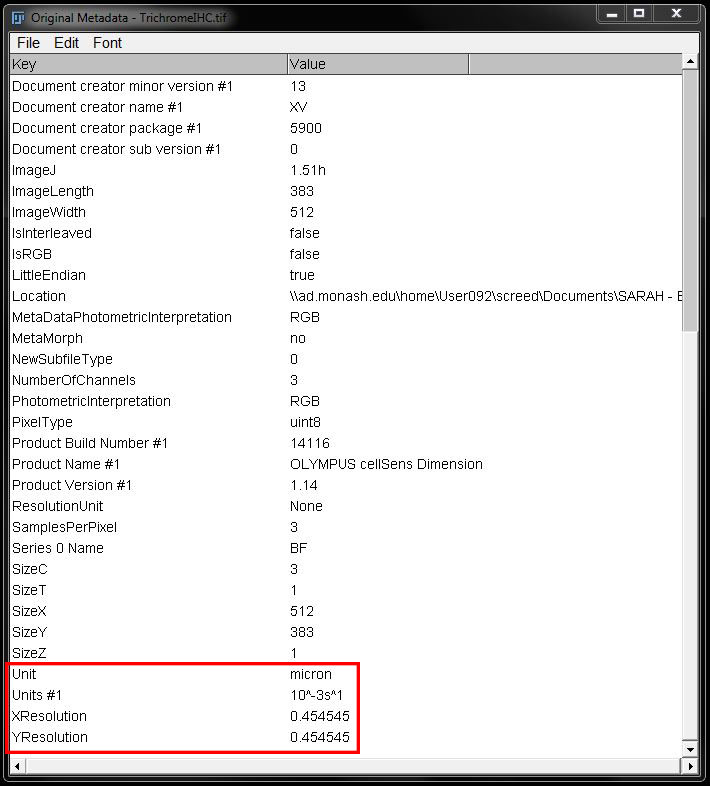
The scale information can look different in the metadata of one file compared to another. How it is listed will be dependent on the file type. In this example, if we scroll downt he metadata, we come to the units, listed as microns, and below that, the scale shown as X and Y resolutions of 0.454545. So this gives us the scale of 0.454545 pixels per micron.
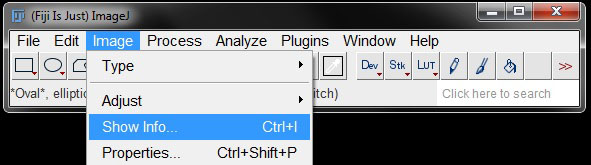
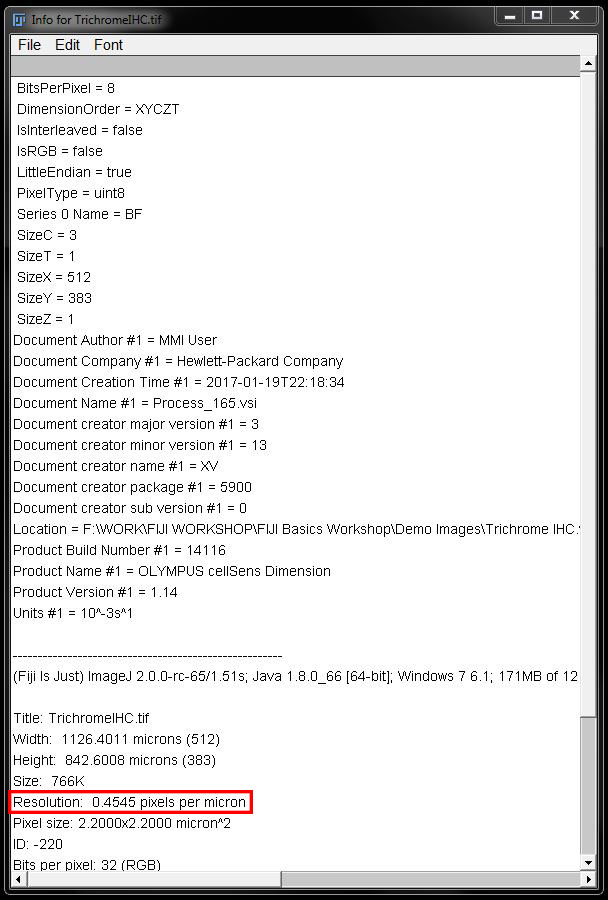
As shown previously you can also find information from the metadata by going to Image -> Show Info (or shortcut Ctrl + I). This is useful if you dont need bio-formats importer to open your image.
You will find the scale information listed here if it was in the image metadata. Again, how it is listed may varry with file type.
Note: Usually if the scale is listed in the metadata, FIJI will scale the images automatically upon opening. If your image is not scaled, you most likely won't find this information in the metadata either.
Setting the Scale Manually
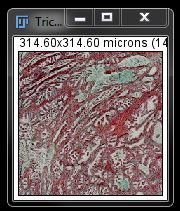
For a non-calibrated image, the dimensions of the image will appear in pixels in the top corner of the image.
![]()
If you know the conversion factor, you can set the scale manually by inputting the conversion into either the image properties or set scale windows.
To input the scale via Image Properties go to Image -> Properties (or shortcut Ctrl+Shift+P), as previously described.
In an uncalibrated image the pixel dimensions will all be displayed as 1. Change the unit of length from pixels to microns and enter the conversion factor in microns (ie: 1 pixel = x microns). For the example used here, the calibration in microns/pixel is 0.45.
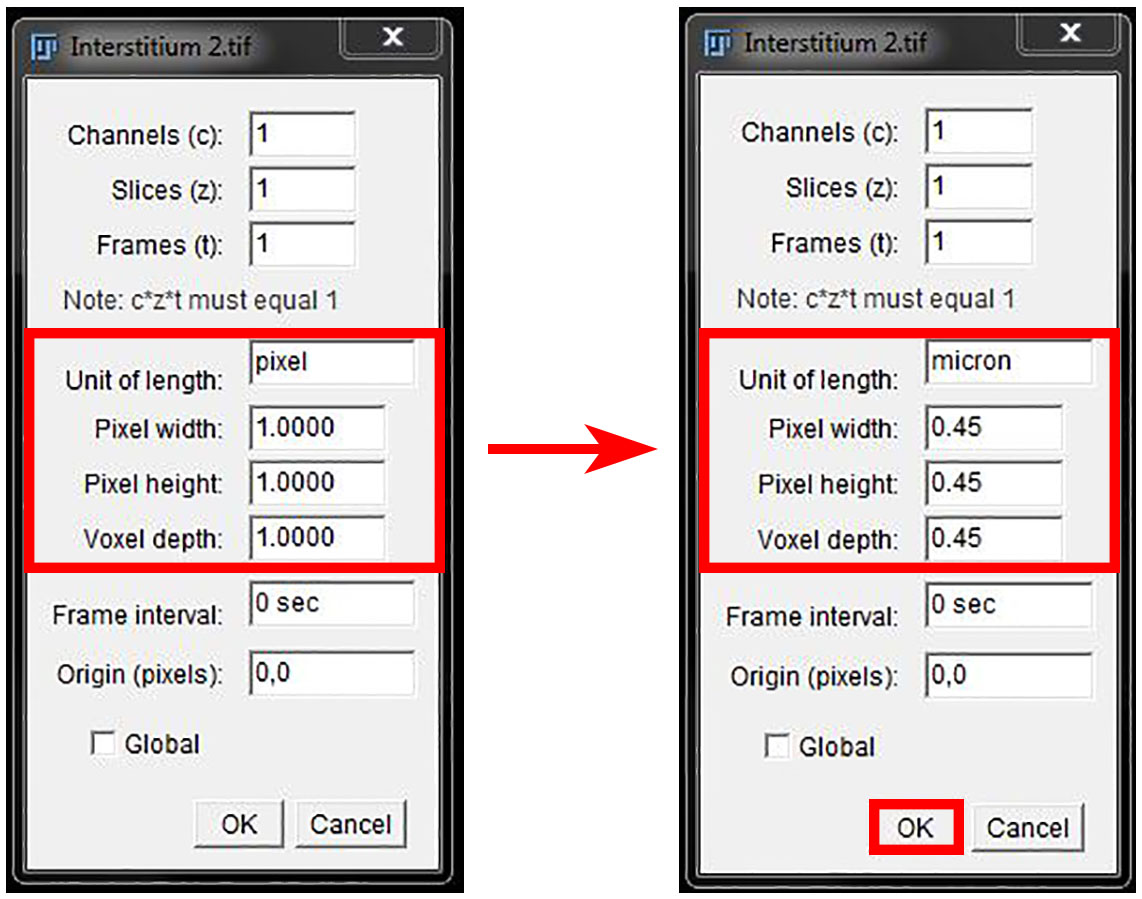
Select OK to save the calibration changes, then save the image to maintain the calibration permanently.
If preferred, you can also input the calibration in pixels/micron via the Set Scale tool. To do this, go to Analyze -> Set Scale, as previously described.
The pixel aspect ratio in the Set Scale window will be displayed as 1. To enter the scale, change the unit from pixels to microns and enter either the distance in pixels (2.22222... for this example) or in microns (0.45 for this example).

Select OK to save the scale, and save the image.
Whichever method you chose, you will now have a calibrated image that you can easily add a scale bar too, or make accurate measurements on.
Adding Scale Bars
To add a scale bar to your calibrated image, select the image and go to Analyze -> Tools -> Scale Bar.

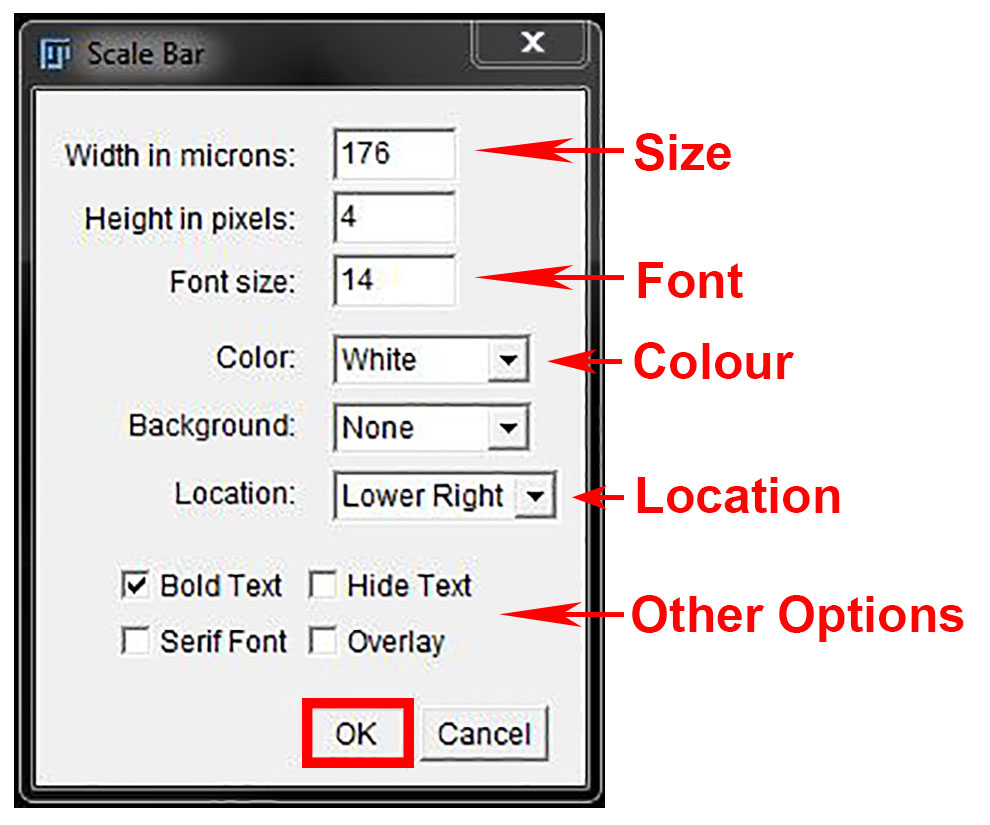
In the resulting window, enter you scale bar preferences.
Under width enter the size you’d like the scale bar to represent.
Enter your Font size and select Colour and Location for the scale bar from the drop down menus.
To show the scale bar line only without dimensions labelled underneath it, check the box next to Hide text.
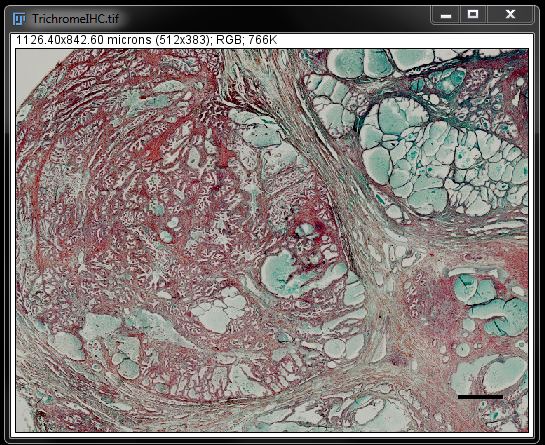
Here we have set a scale bar of 100microns, in black at the lower right corner of the image. You will see a preview of the scale bar on the image as you make changes.
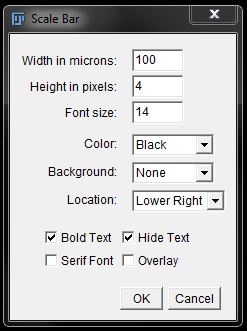
When you are happy with the appearence of your scale bar, select OK and save the image to save the scale bar.
If you want your scale bar in a very precise location within your image, you can draw a line ROI in that location on your image then follow the steps to addthe scale bar. In the options window it will add a scale bar the same length as the ROI, you can over-ride this and enter any length you want. The location will show "At Selection".
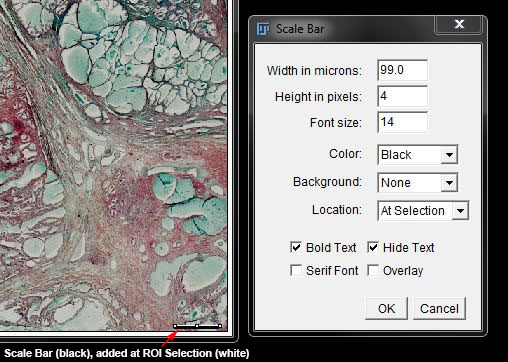
make any other changes you want and again, select OK and save the image to insert and save the scale bar.
Cropping Images
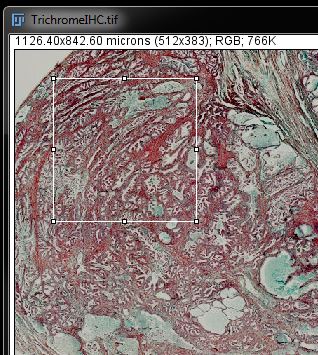
It is always reccommended that you keep your original image unaltered and create a duplicate for cropping. You can easily take care of duplication and cropping on one step by drawing an ROI in your original image and duplicating the section.
Select your ROI tool, as previously described, and draw a region of interest around the area you want to crop.
Right click in the selection and choose Duplicate from the drop down menu.

In the Duplication window you can give the image a new name or keep the default.
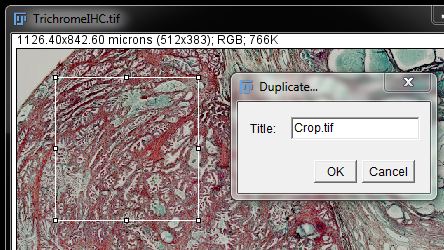
Click OK to create the duplicate as a new image.
To crop an already duplicated image, or without duplicating, select your ROI tool and draw an ROI as above. Then go to Image -> Crop (or use shortcut Ctrl+Shift+X).
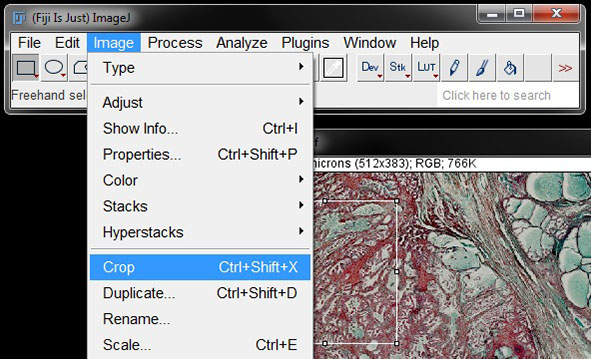
This will crop the active image to the selected ROI without any duplication.
Resizing or Scaling Images
You can resize, or scale, your image using several different methods. All of these methods resize your image by scaling the pixels. While size changes can be undone (until you hit save) it is still recommended you work with a duplicate image when making any changes to pixel information and always leave your original data unchanged.
Because these methods alter the pixel information within the image they should not be used prior to any measurements being made on an image.
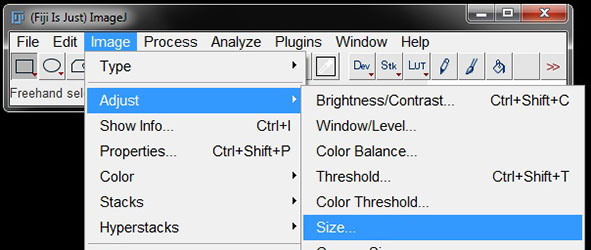
The first method is the Image Size tool, which is found under Image -> Adjust -> Size.
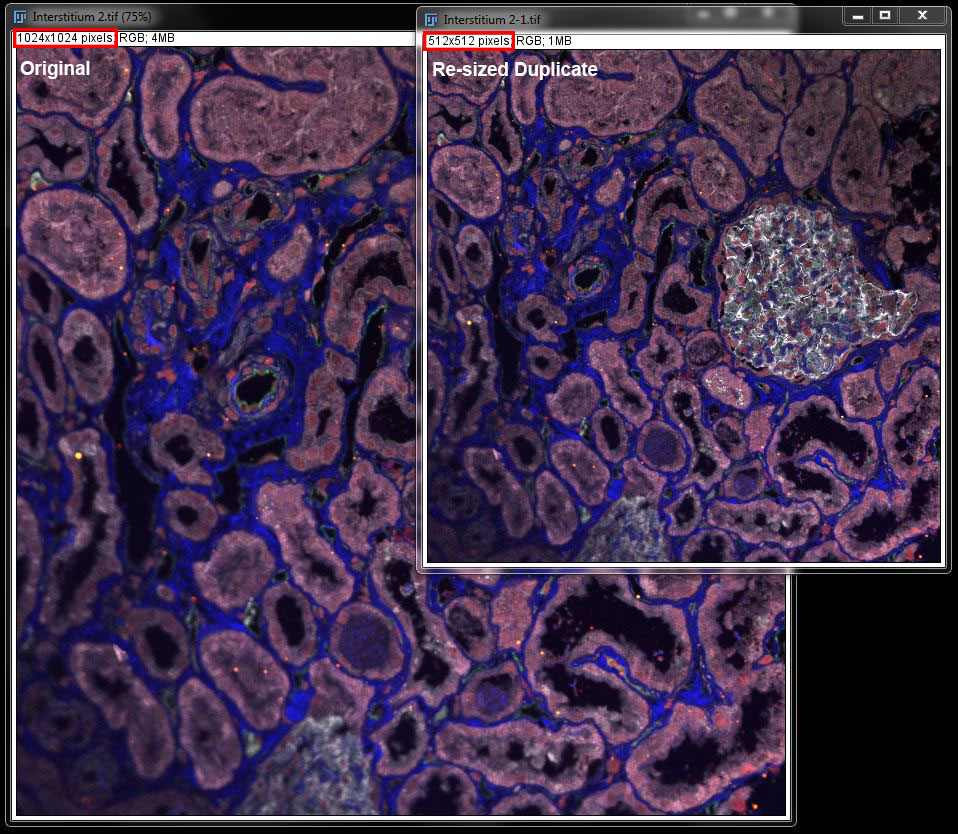
This will open the Resize options window, where you can enter the new image size in pixels. You can also select to Constrain Aspect Ratio for the image and the Interpolaiton. We have set the new size for our image as 512 by 512 pixels and we have removed averaging and set interpolation to None.
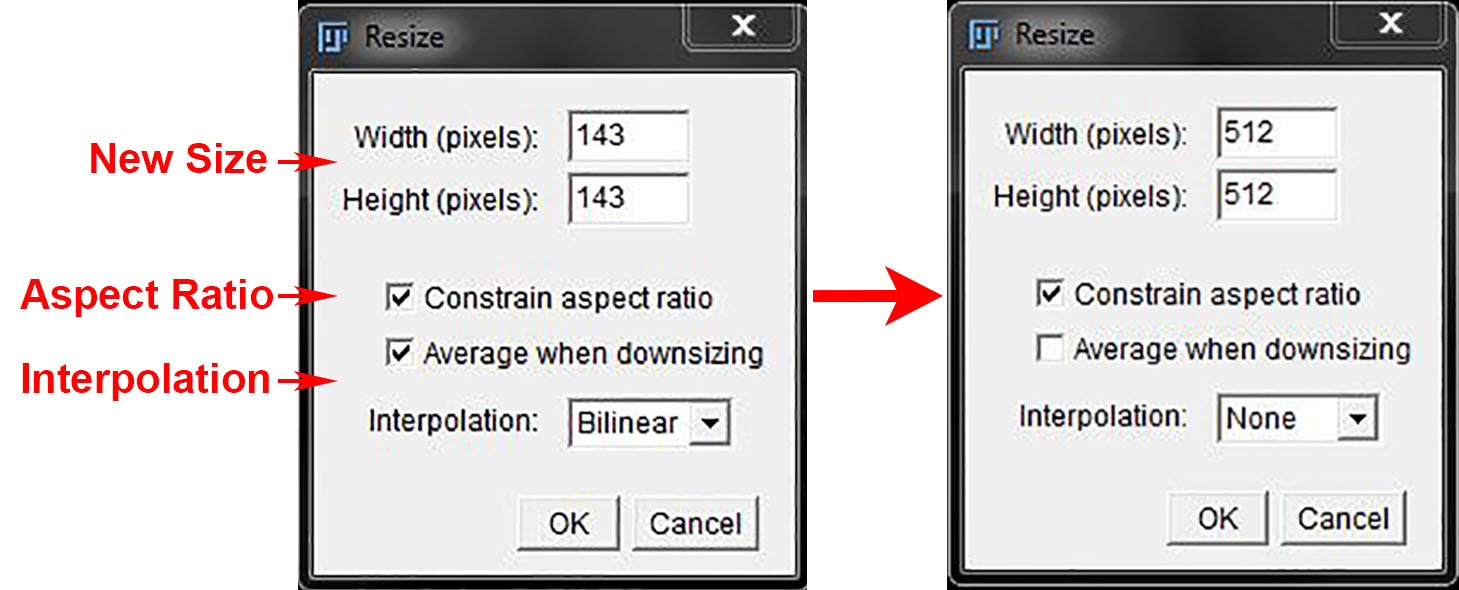
Select OK to apply the changes to the image. Note not only the difference in size here but also the difference in the pixel dimensions following the image resizing.
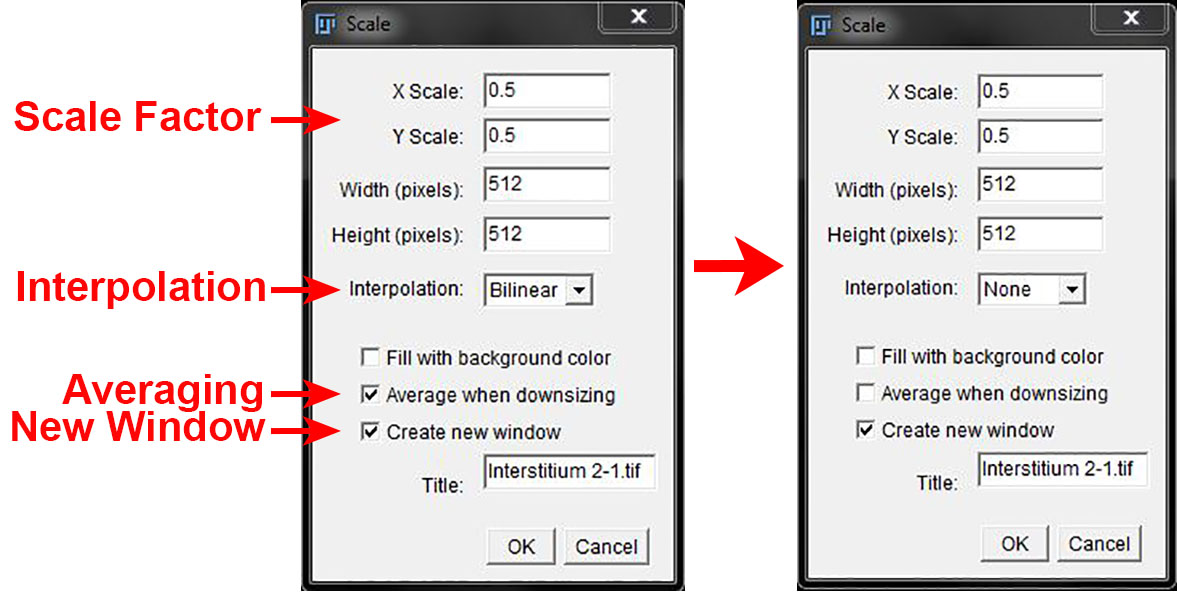
The next method for changing image size is the Scale tool, which is found under Image -> Scale (or use shortcut Ctrl+E).

In the Scale window, enter the vale by which you want to scale your image (ie: scale factor of 2 will double the image size, scale factor of 0.5 will halve the image size). The aspect ratio will automatically be constrained, when you change the scale factor for X, the Y scale factor will adjust accordingly. The height and width (in pixels) will also automatically adjust according to the scale factor entered.
Select settings you require for the Interpolaiton and Averaging.
The biggest benefit to using Scale as your method of resizing is that you can select Create new window so changes will be made to a duplicate image, not the original. This means that you can skip duplicating the original before scaling and the original will always remain unchanged. You can give the new image a different name or keep the default.
Here we have used a scale factor of 0.5 to half the image size and selected no interpolation or averaging. This gives us essentially identical settings to those used using the Image Size tool above.
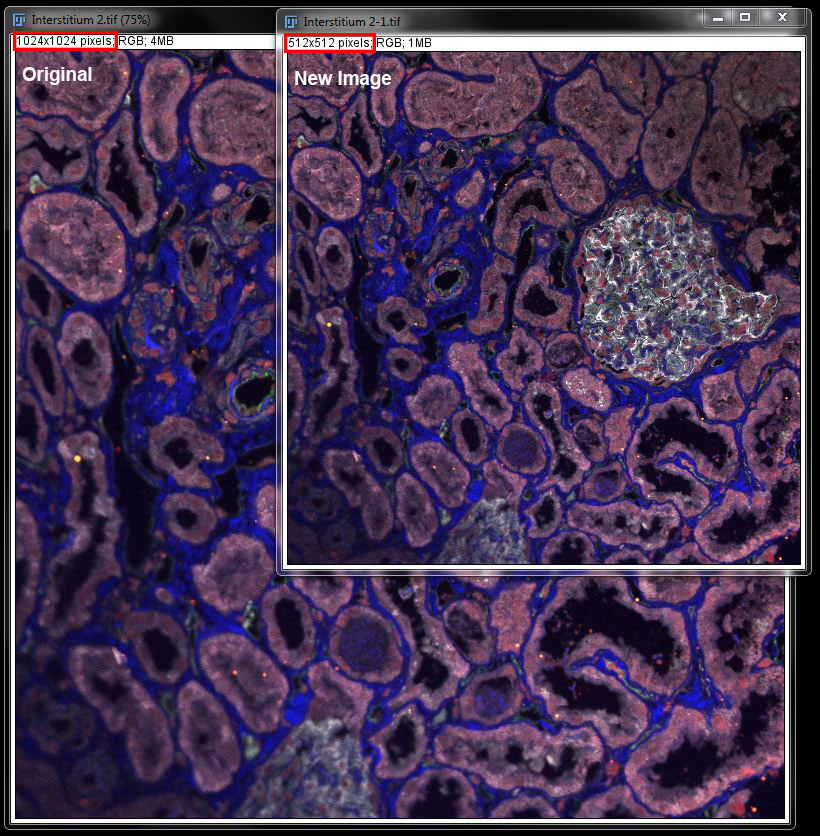
Click OK to apply the changes to the image. A duplicated image, at the new size, will be created alongside the original image. Again notice both the change in image size and the change in pixel dimmensions int he new image.
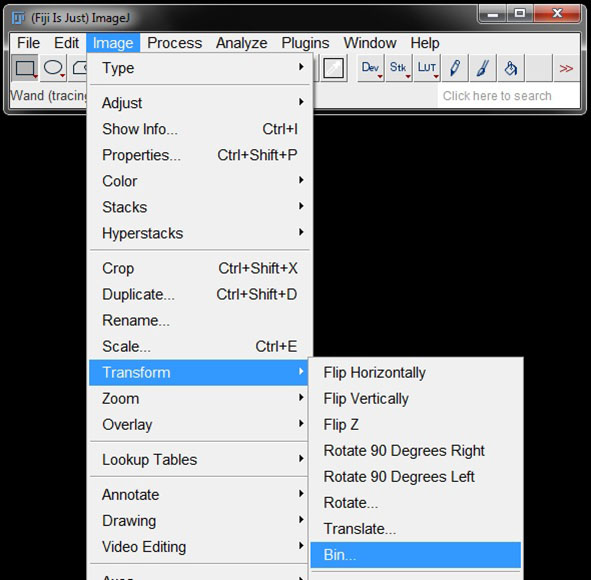
The third method is Binning, which is found under Image -> Transform -> Bin.
Binning reduces an image by pixels similar to the other methods. The disadvantage of using binning is that it can only reduce image size, you can't scale up (ie: create an enlargment, etc). When using Re-sizing or Scaling you can increase or decrease image size. The main benefit of using Binning as your resizing method is that it is supported by the Undo command and therefore changes can be reversed. Binning is usually recommended more for reducing file size than changing image dimmensions for display/presentation purposes.
In the Options, enter the Shrink Factor or how much you want to reduce the image. For example 2 x 2 binning will rduce the image size by half. Select your method from the Bin Method drop down menu. Here we have used Averaging.
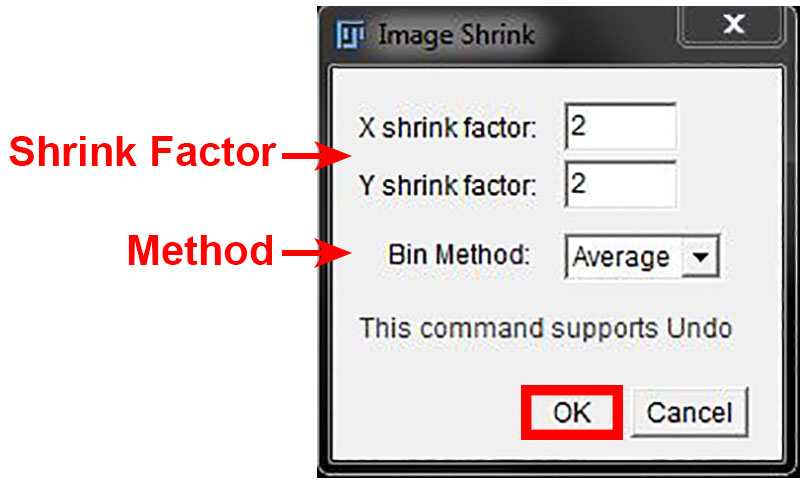
Click OK to apply the changes to the image. Again be aware of the change in pixel dimmensions of the image as well as size appearence.

The final method is Scale to DPI, which is found under Image -> Adjust -> Scale to DPI.
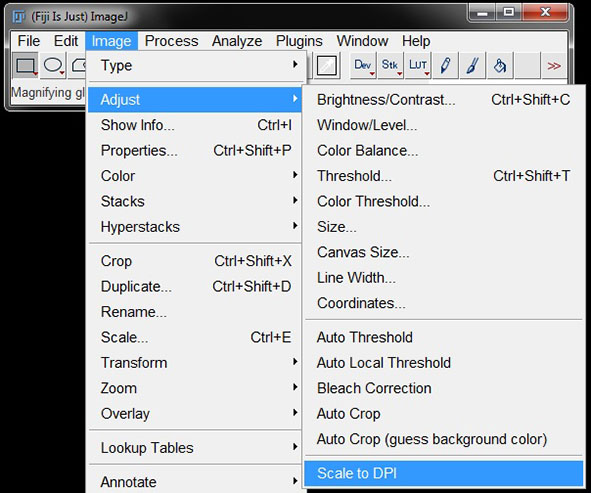
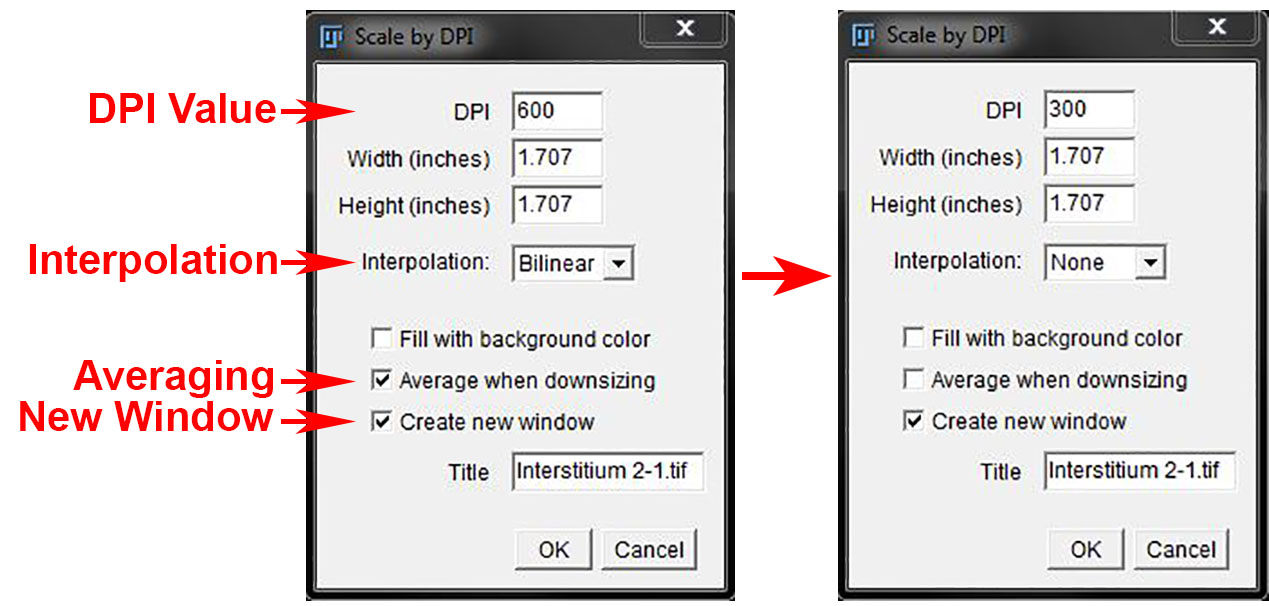
Under Scale to DPI you can enter a final image resolution size in dots per inch (or DPI) and the image will be scaled accordingly. Enter your final required DPI in the first box and select the Interpolation method from the drop down menu and choose whether to average or not. Select the check boxe next to Create new window. You can give the resized image a new name if preferred. here we have again halved the image size by scaling froom 600 DPI to 300 DPI, and chose no interpolation and no averaging.
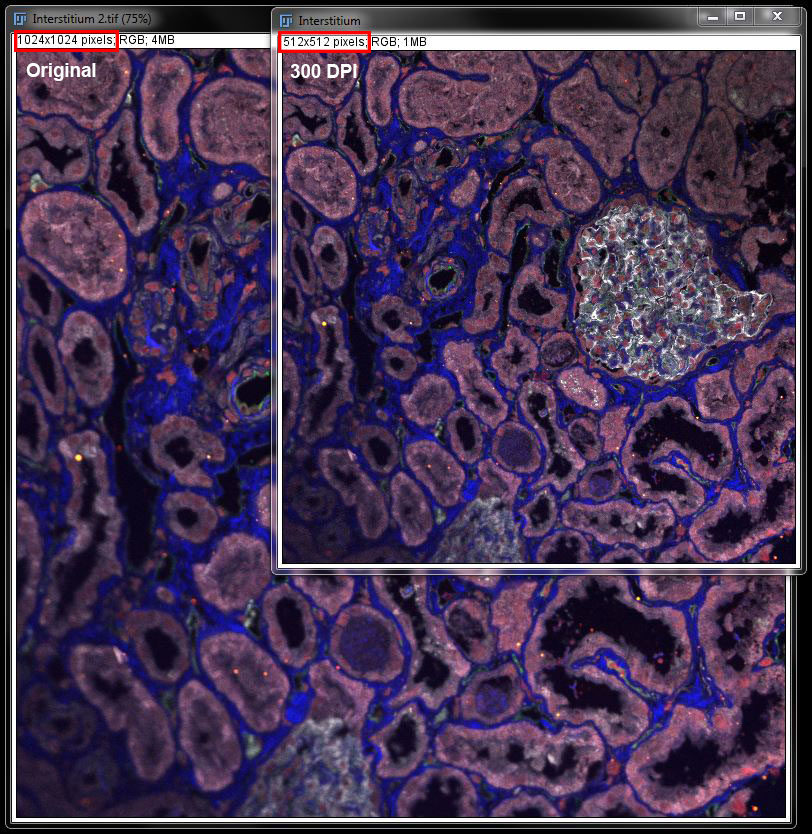
Click OK to create the new image. A new window will be created with the re-sized image. As always note teh difference in appearance and pixel dimmensions in the new image.
A benefit to using Scale to DPi to resize, along with the create new window option, is that you can also resize by entering a size in inched into the options and maintain the DPI. For example here we leave the DPI at 600, but enter size values of 1 inch by 1 inch. Again select your choices for Interpolation and Averaging and select Create new window.
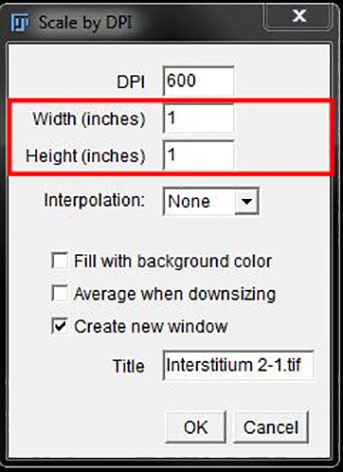
In the new image now you will see a slightly different size to the previously resized images and teh dimmensions are now displayed as 1in x 1in. new pixel dimmensions can also be found in brackets beside the new dimmensions (here: 600 x 600).
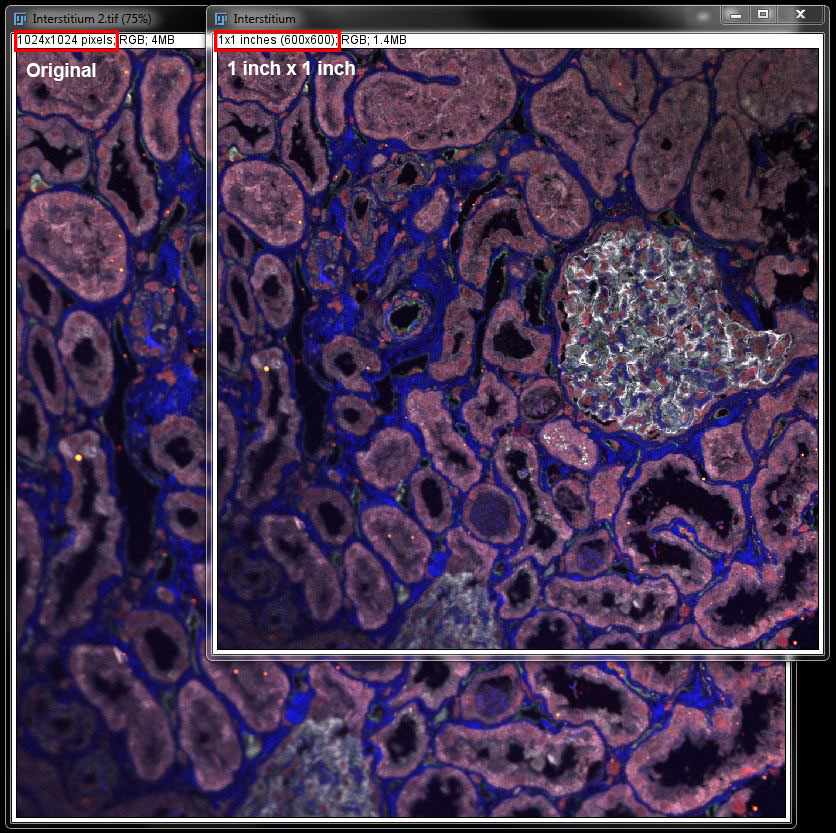
Note: The size entered here is the display size of the image, that is; as a panel in a larger image at 600DPI this picture would be 1 inch wide by 1 inch long. The sizes used here are not related to the pixel/micron scale of the image.