PART 3: BIO-FORMATS IMPORTER
Images saved in raw file format from microscope software packages are unique to that software and often will not open in standard image viewing software. However, these formats can be easily opened in FIJI using the Bio-Formats Importer. This is a pre-bundled plugin in FIJI but it must be downloaded separately for ImageJ. It is also known as LOCI tools, this is the plugin name for ImageJ.
Examples of the different file types discussed in this section (Leica, Olympus, Nikon, DeltaVision, Zeiss) can be found in the Bio-Formats folder of demonstration images.
Configuration
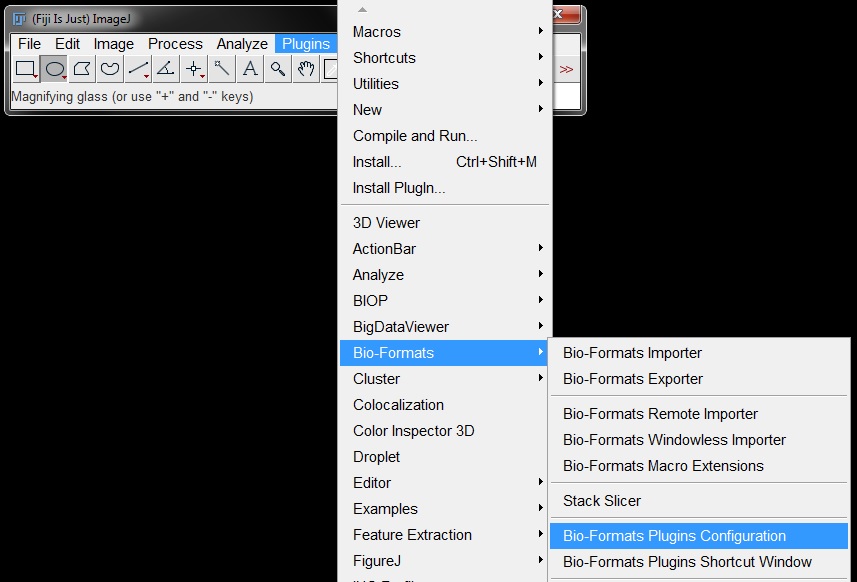
You can check the file types enabled in the Bio-Formats importer, as well as turn specific formats on and off and change preferences by opening the configuration settings. To do this go to Plugins -> Bio-Formats -> Bio-Formats Plugin Configurations.
This opens a configuration window. Select the Formats tab from the top to display and modify the available programs and equipment.
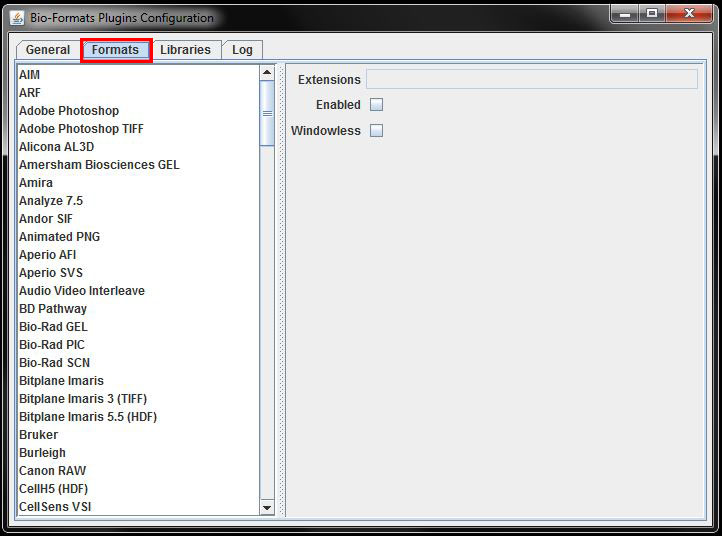
Select your file format from the list to check it is enabled and see compatible extensions.

Selecting the Windowless box will open these file formats without first opening the import options window. This speeds up opening but means you cannot change import settings on individual images and all images will open with the default settings (or those previously set by you when opening files with Bio-Formats). You can come back to configurations and reverse this if you need to change import options at another time.
Opening with Bio-Formats
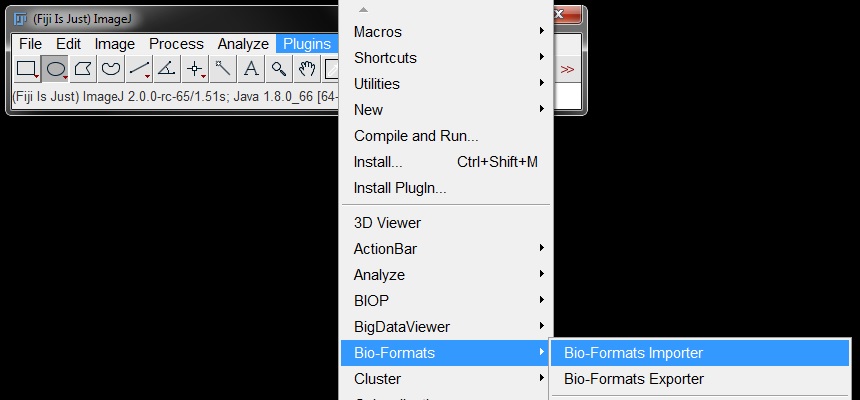
You can import files by going to Plugins -> Bio-Formats -> Bio-Formats Importer.
With the Bio-Formats plugin installed, you can also open most compatible file types by going to File -> Open and selecting your file, or dragging and dropping onto the FIJI interface as you would any other image file.
During the opening process for all file formats the Import Options window will open, unless you have previously set ‘windowless’ opening for that file type under configurations. In the options window you can change the settings for metadata, separating channels, z-planes or time points into single image windows and colour options.
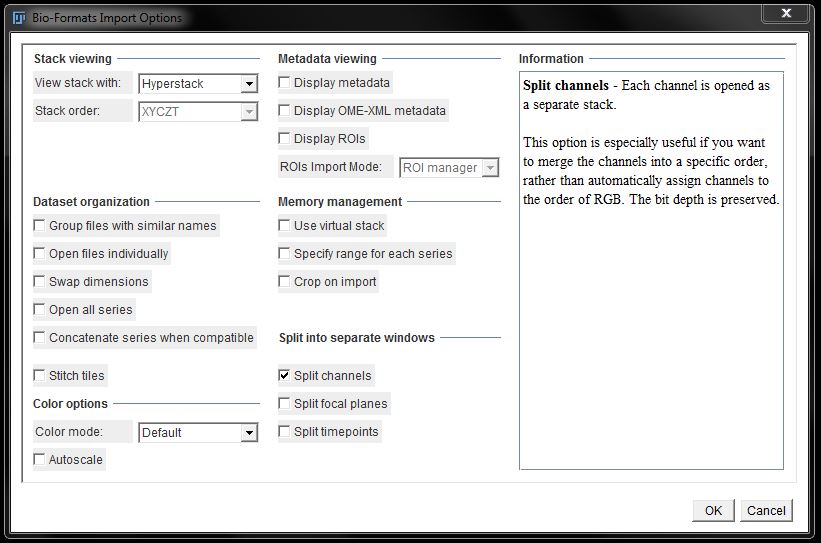
When you have selected all options you want, click OK to open the image.
These different options and variations in opening files with the Bio-Formats Importer are discussed below followed by how these variations apply to common file formats.
Metadata
To view the in-built image information, known as metadata, select the box next to Display Metadata in the options window of bio-formats importer. Then click OK to open both the image and metadata.
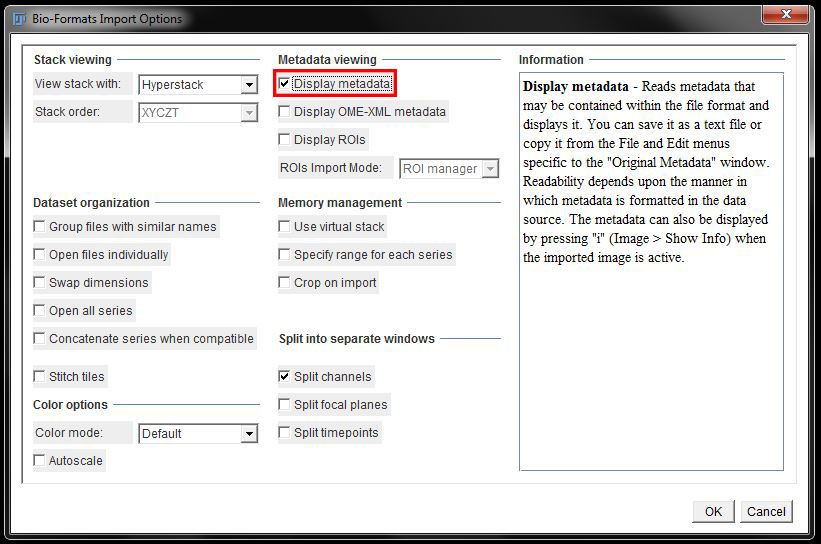
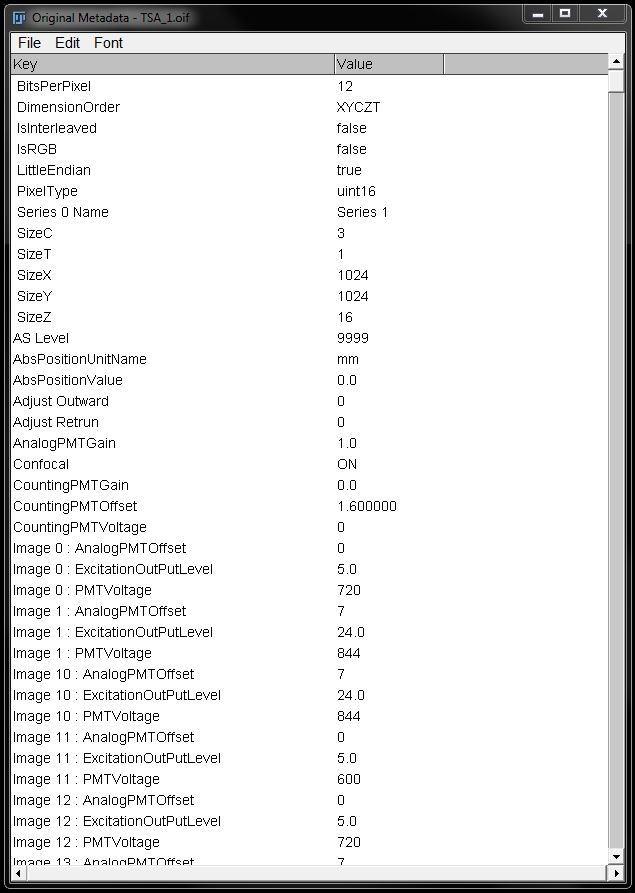
Metadata will be displayed in a separate window to the image as a list. Here you will find information including things like bitdepth, channel information, acquisition parameters and scale.
Channel and Colour Options
Sometimes colours can’t be assigned correctly from the metadata or you may want to assign specific colours to your image. You can do this in Bio-Formats Importer by selecting Custom from the drop down menu under Colour Mode.
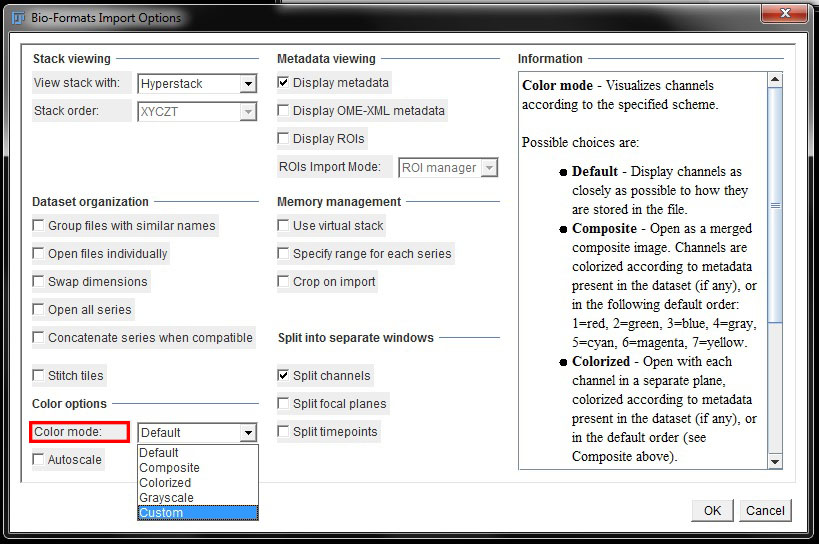
In the resulting Bio-Formats Custom Colourization window you can set the RGB colour values for each of the channels. Once you are happy press OK. The file will open with the assigned colours.

Split Channels/Focal Planes/Time Points
Selecting the boxes next to split channels, focal planes or time points will result in each plane opening as in individual image, rather than a stack or hyperstack.
This can be useful if you want to extract a single z-plane or time point from a series, or only want to display one channel from your image. All images will open, but you can easily close the ones you don’t need.
Specific planes, channels or time points can also be extracted when working with stacks (discussed in section 8), but in some circumstances, opening separately can be a quicker or easier option to use.
Opening Image Series
Some files will contain multiple image stacks or experiments within one file. These can be opened separately through bio-formats importer.
When opening files with multiple experiments, a second window will be displayed after the opening options. This second window displays all of the experiments in a list.
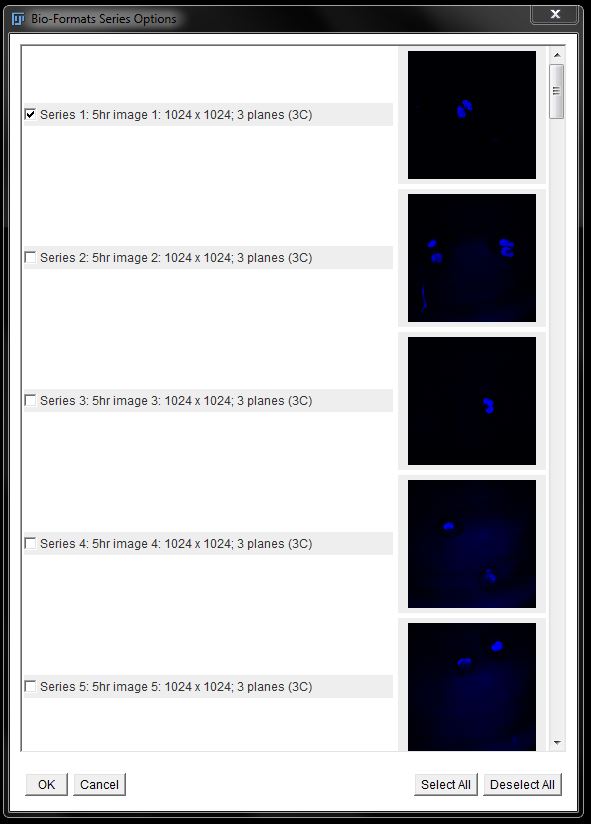
Tick the box next to the one you want to open and press OK. Ticking multiple boxes on will open multiple datasets, but doing this could put strain on the FIJI program memory and cause a crash.
Images will open using the options selected in the initial opening window.
Different Data Sets (Olympus, Leica, Nikon, DeltaVision, Zeiss)
In general, the file will be displayed as you have selected during the opening process. However, there are a few variations in opening using bio-formats depending on the file. The common file formats are discussed below.
Leica (*.lif files): The saving format for Leica files means they will always contain multiple data sets in the single file. Follow the steps for opening image series as above.
Olympus (*.oif files): The channel information from Olympus files cannot be read correctly when opening these files in FIJI. You can open the file as normal and reassign LUTs (explained in section 6) or you can choose custom colour and assign colours to channels as you open, as described above.
Nikon (.nd or .nd2 files): Nikon files usually open without any special requirements. Some Nikon files may contain multiple datasets and require image sequence opening method to be used.
DeltaVision (*.dv files): Files from DeltaVision will open without special requirements, but open in grey scale and will need to be false coloured if required.
Zeiss (.czi or .lsm files): Zeiss files will open as a hyperstack directly without any dialog box being shown.