PART 6: IMAGE ADJUSTMENTS
It is sometimes essential to adjust an image for publishing or to highlight an area of interest. Some adjustments need to be done carefully so as not to remove or add data from the original image. In this regard, it is usually safe to adjust linear parameters such as brightness and contrast (histogram levels) as long as under and over saturation is avoided. Adjusting non-linear parameters such as gamma and curves is strongly discouraged under all circumstances as it will change the relationship of the data in the image. All adjustments made to images prior to publication should be linear adjustments only, should be applied equally across the entire image and should be disclosed in the methods and/or figure legends.
Note: In general it is recommended that you avoid performing any measurements on images which have been adjusted. Whenever possible analysis should be carried out on the untouched original data.
In this section we use the images RGB-Blue.tif, RGBstackProjected.tif and NeuralTube.jpg for demonstration purposes.
Brightness and Contrast
Brightness and Contrast are considered linear adjustments, provided they are applied equally across the entire image.
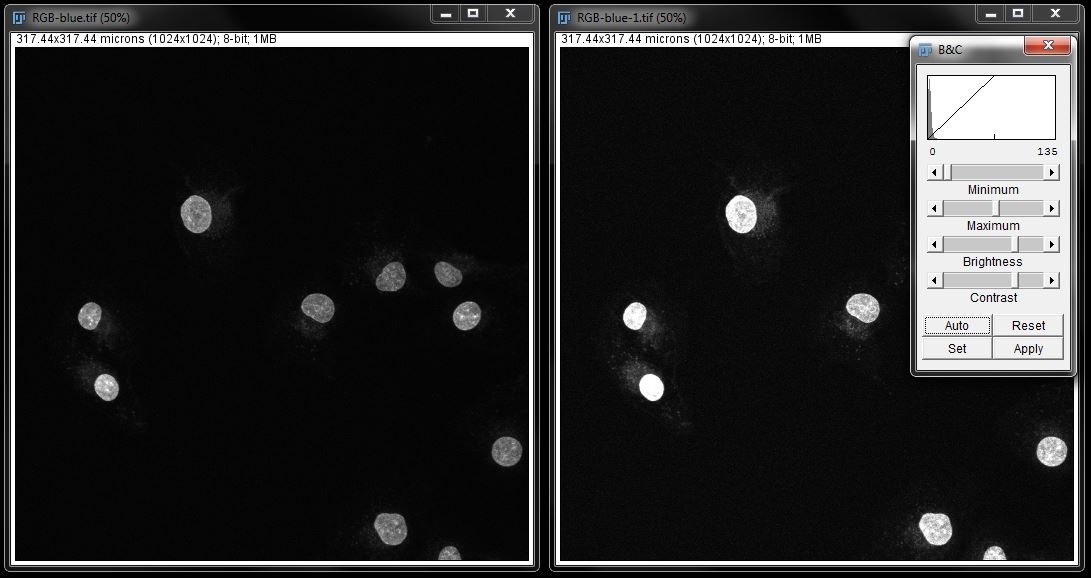
To adjust the brightness and contrast in an image, select the image and go to Image -> Adjust -> Brightness/Contrast (or use shortcut Crtl+Shift+C).

This will open a window with a histogram of the image data at the top with the range of intensities in the image shown. In this example the range is 0-255, as it is an 8bit image. The dynamic range for the intensities will vary depending on the image format and bit- depth of the camera used. Bit depth is discussed in more detail in Part 4 of these notes.

You can adjusting the brightness and contrast in several different ways. You can move the Minimum and Maximum or Brightness and Contrast sliders. These should only be adjusted to the limit of the data and not beyond it.
The Auto button will calculate and apply a histogram stretch automatically, but does not always make an appropriate adjustment.
You can also press the Set button and enter values directly.

You will be able to see adjustments as a preview in the image as you alter the levels. Once you are happy with your settings press the Apply button. Once the Apply button is pressed the original values in the image are altered to the new ones and the original data is lost. For this reason it is best to work on a duplicate image and save the result as a different file so as not to lose the original data.
Below we see the difference between the original image and an adjusted duplicate.
Gamma
Gamma is a non-linear adjustment as it alters the relationship between the dark and light pixels.
Gamma adjustments can be made to the image by selecting your image then going to Process -> Math -> Gamma.

This will open a gamma adjustment window with a slider to adjust the gamma value up or down.
Adjust the slider as required, or input a value directly into the box. You can see adjustments in the image as you make them by checking the box next to Preview. When you are happy with the adjustments, click OK to apply the changes.
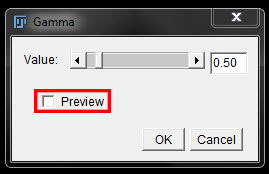
You will see from the images below that gamma adjustments have a significant impact on the image, and as these are a non-linear adjustment the relationship between dark and light is altered. It is recommended that gamma adjustments are avoided, and definitely not used on images that will be measured or published.

Colour Balance
Colour balance is more of a grey area. It is a linear adjustment (essentially equal to brightness and contrast) when applied to the entire channel image. However, it considered a non-linear adjustment in general as it alters the relationship between different components (channels) of the same image, ie: one is changed without the others being changed equally. Changing the brightness of only one channel is particularly problematic when comparing intensities or looking at co-localisation. Therefore it is recommended that Colour Balance changes be avoided.
You can adjust the levels of individual colours within an RGB image using the Color Balance tool. To find this go to Image -> Adjust -> Color Balance.

In the Colour Balance window you can select the channel from the drop down menu, then use the sliders to adjust the Minimum and Maximum as described above for a monochrome image.

This will essentially alter the brightness and contrast of the selected channel only and as such alters the relationship between channels. For this reason, any measurements based off intensity or the relationship between channels should not be performed following changes to colour balance.
In the example below you can see the difference between the original image on the left and the adjusted image on the right, which has the levels adjusted for the green channel only.
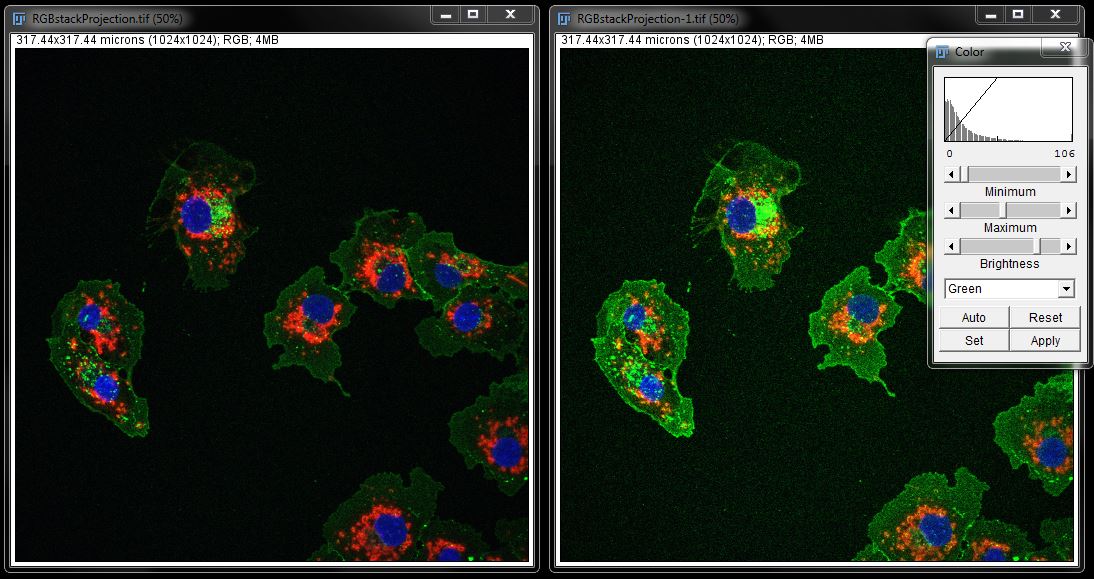
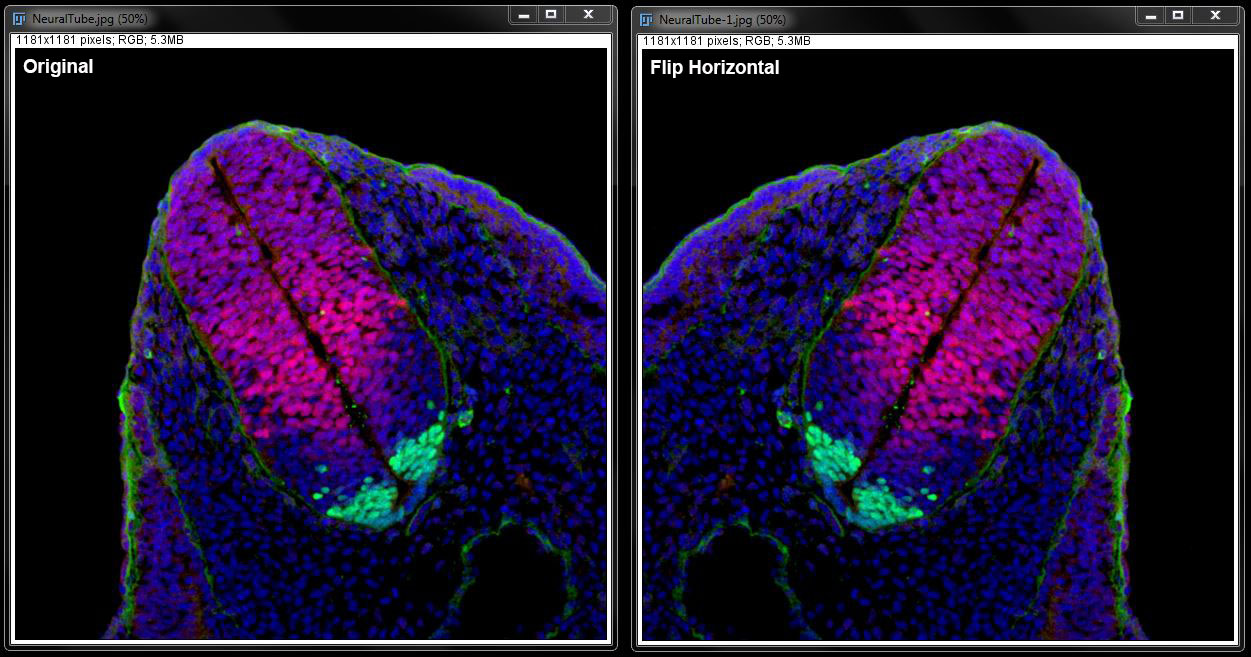
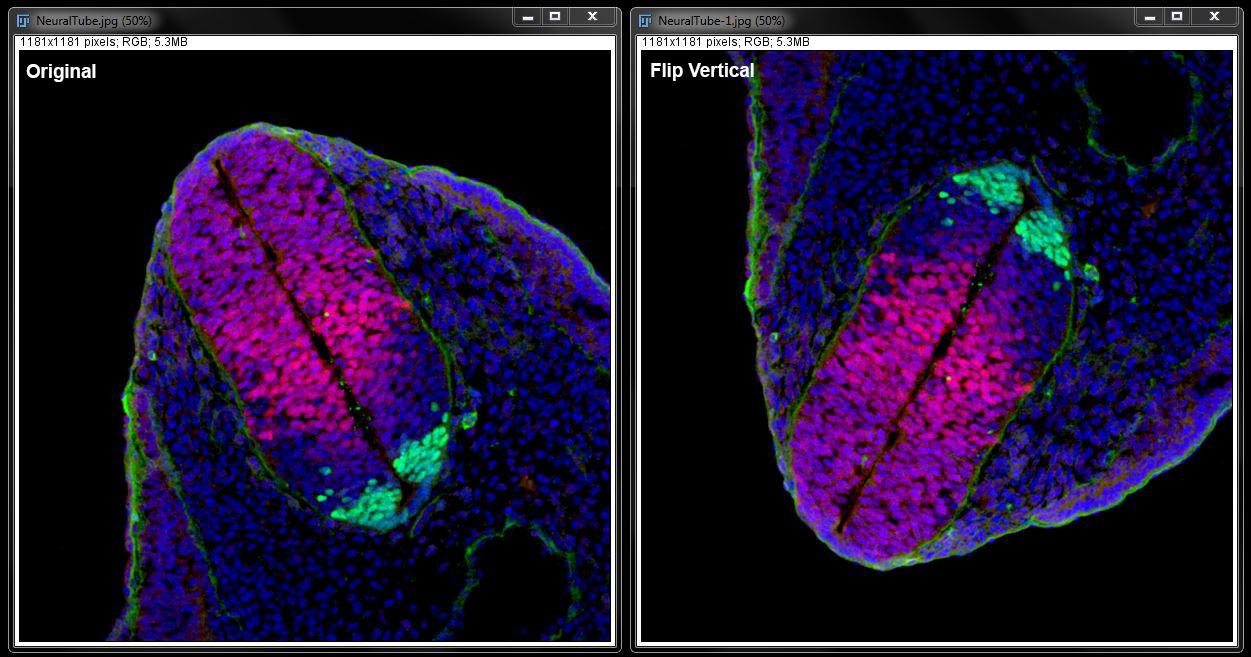
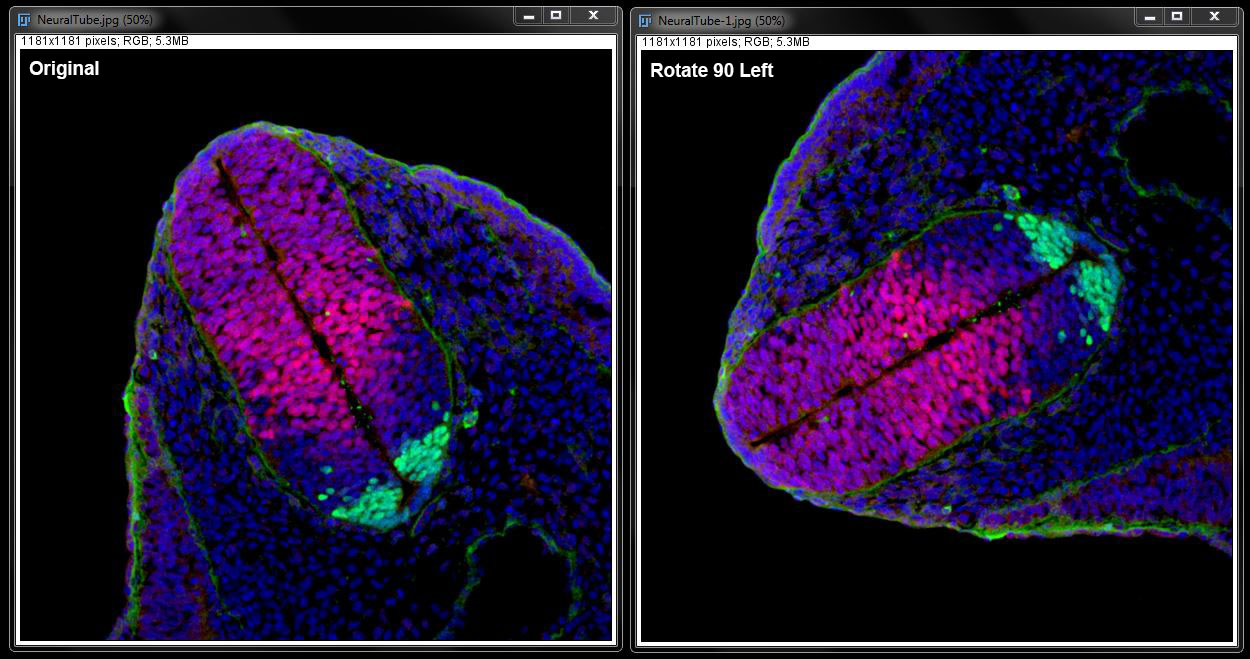
Image Rotation
You can easily straighten an object in your image with the Image Rotation tool. Using this tool you can rotate to a defined angle, or completely flip the image. For images with specific structural arrangements it is advised that you use image flipping and rotation with caution, as complex structures may become distorted.
To flip or rotate your image, go to Image -> Transform and select your option.
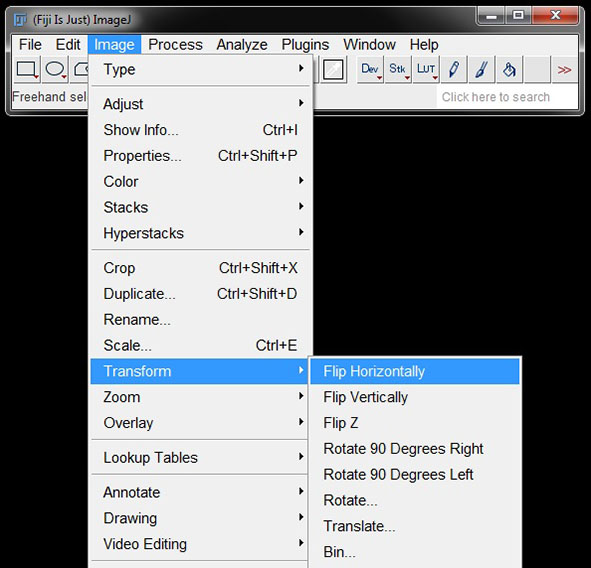
Flip Horizontally and Flip Vertically flip the image along the left hand side and top edges respectively.
Rotate 90 Degrees Right and Rotate 90 Degrees Left turn the images to the right or left.

You can also rotate an image to other angels of your choosing. To define the angle yourself, select the option Rotate from the options under the transform menu. This will open a new window where you can define the angle of rotation. Enter the angle in degrees in the first box.
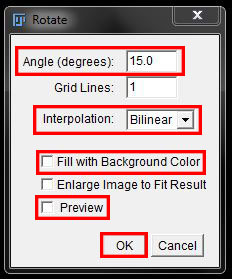
Select None from the drop down Interpolation menu to minimise any changes to pixel information. Selecting Fill with Background Color will ensure any resulting blank space is coloured the same as the image background (usually black or white).
Note: for images with high background levels, esultingin greyish background colouring the bkack background fill will be more noticable. The image can be cropped after rotation to remove te backfilled areas.
To preview the angle before completing the rotation select the check box next to Preview.
Once you are happy with your rotation angel click OK to apply it to the image.
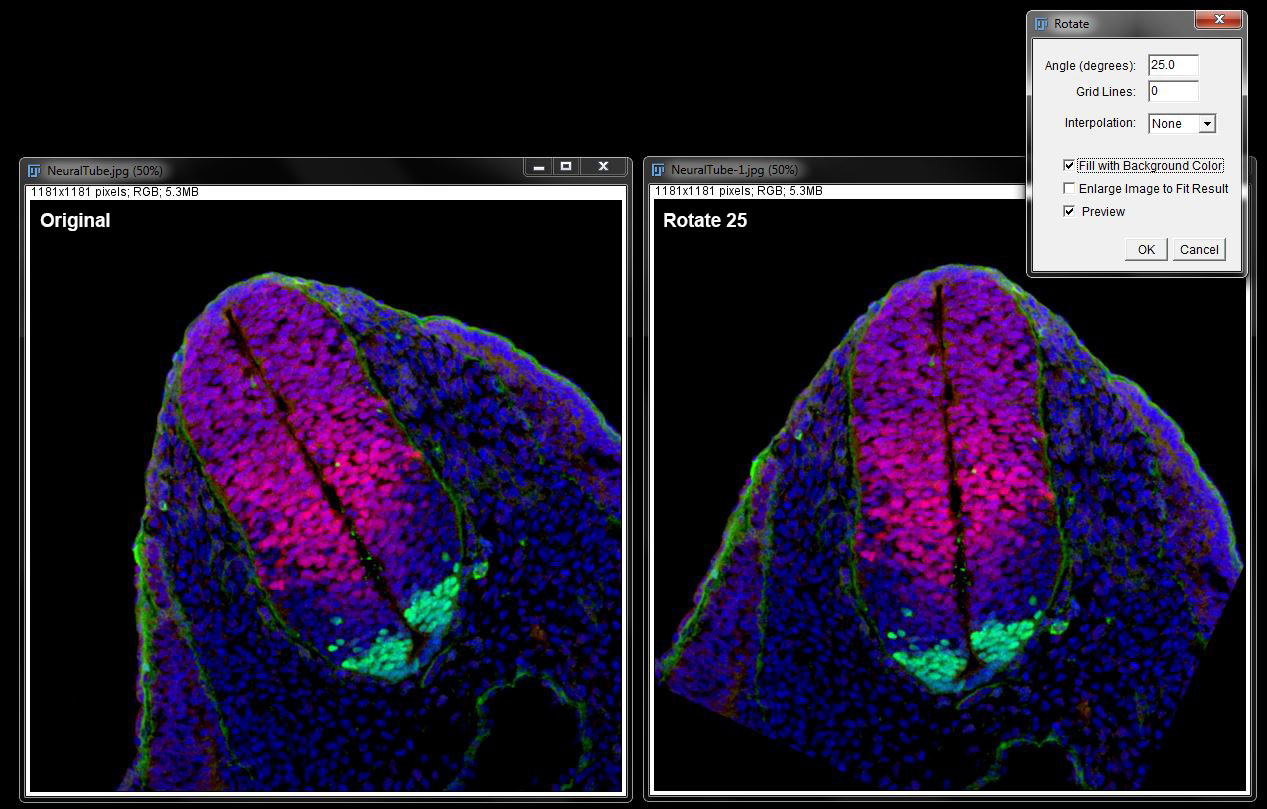
Image Translation
You can also shift the image within the frame using the Translate tool. This can also be found under the Image -> Transform menu.
![]()
This will open a window where you can enter your offset values to shift the image in x and y. The values are entered in pixels.
Again select None under the Interpolation drop down menu to minimise pixel information changes. Check the box next to Preview to see the changes before applying to the image.
![]()
When you are happy with the changes, click OK to apply.
![]()
Again any blank space created by moving the image will be filled with black, but hte image can be cropped to remove this if neccessary after translation is complete.
Note: Always apply transform and translate movements to duplicates only and save as a copy. These tools should only be used for display purposes, never prior to analysis, and should always disclosed if used in published images.